Gardeners of all ages can easily create small greenhouses and start seeds! This activity can be done any time of year (even in the middle of winter!) since the greenhouses stay warmer inside than the surrounding environment. The result is hardy seedlings for your garden! Created by Daina Gulbis, RHA Educator
Level: All ages. Younger children will need adult help to prepare the containers.
Duration: One hour
Setting: Greenhouse creation and sowing of the seeds can be indoors or outdoors. Containers will be set outside when finished.
Materials:
- Clear or translucent recycled gallon milk jugs, water jugs, juice bottles or salad containers (which can be stacked to ensure seedlings have room to grow.)
- Soil, preferably an organic soil mix that does not contain any moisture pellets or fertilizers
- Seeds
- Permanent marker
- Duct tape
- Popsicle stick or similar to use as plant markers
- Scissors
- Drill, awl or hot glue gun
Background Information:
Create a small greenhouse from a recycled container and watch seedlings sprout! The outside container will mimic nature’s patterns and the seedlings will emerge when they feel that conditions are right. The outdoor seedling will already be hardened off and ready for planting after the danger of the first last has passed.
For older children (or adults) a comparison study can be run indoors. See below for details!
The Activity:
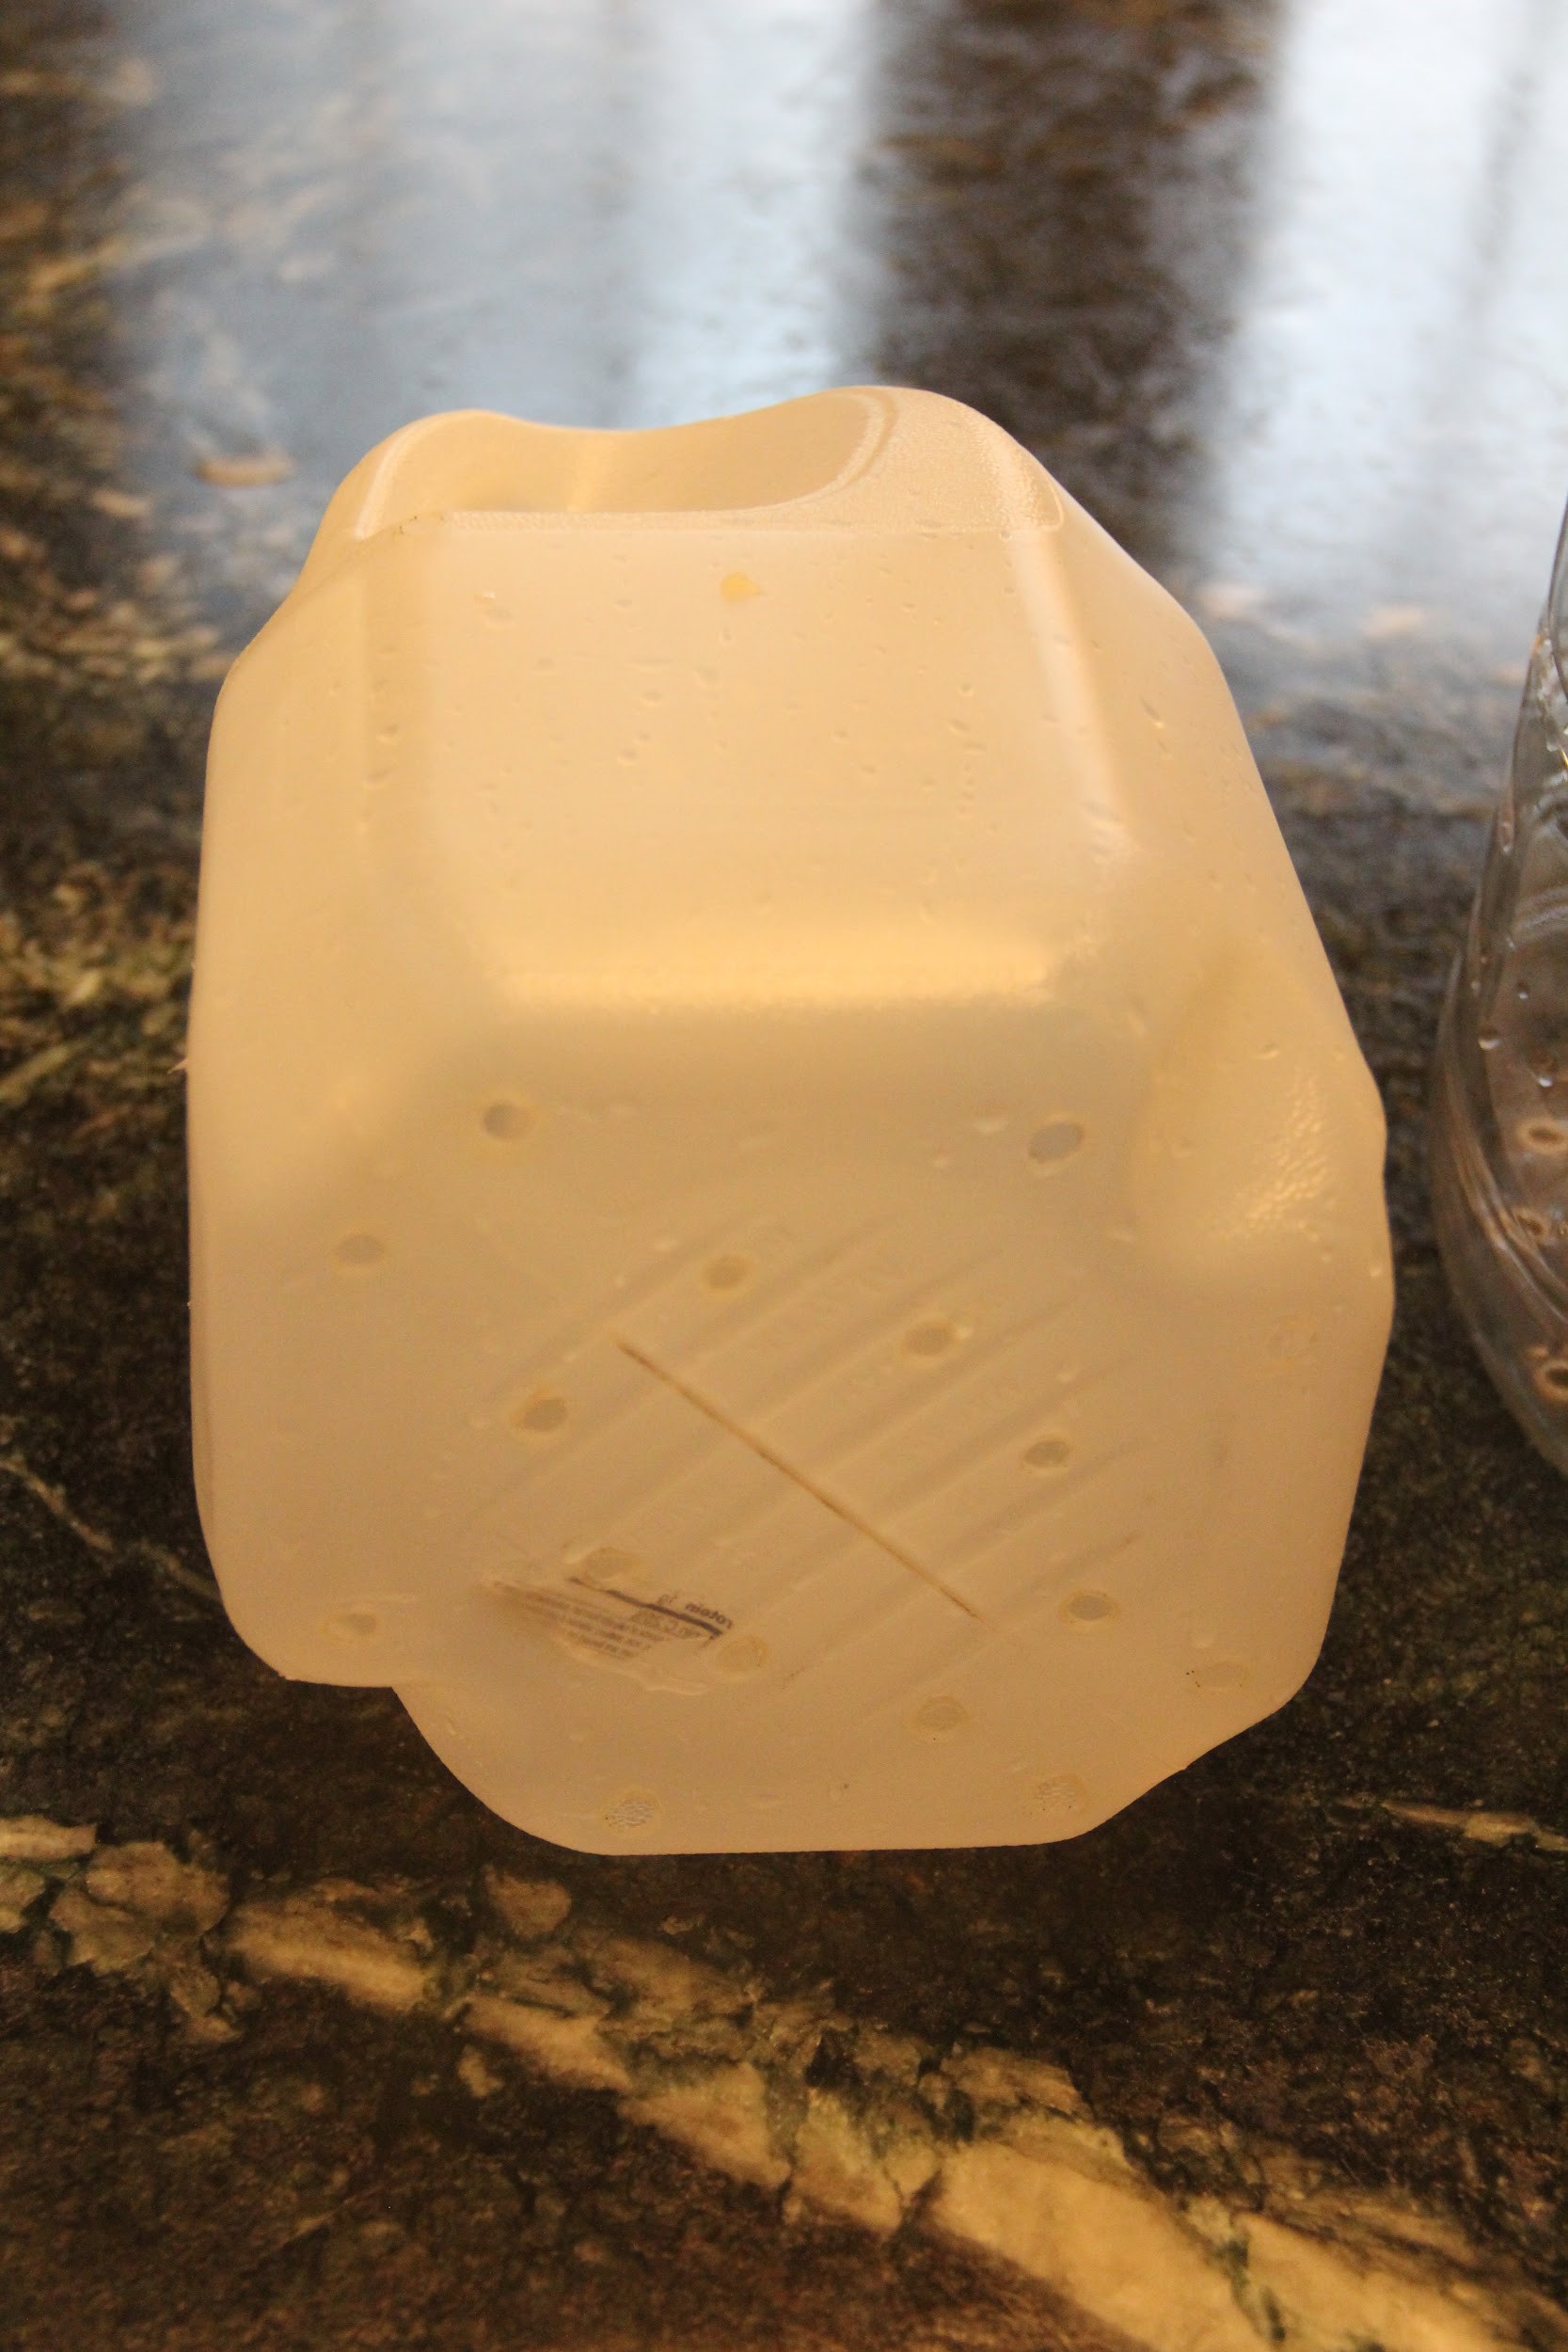
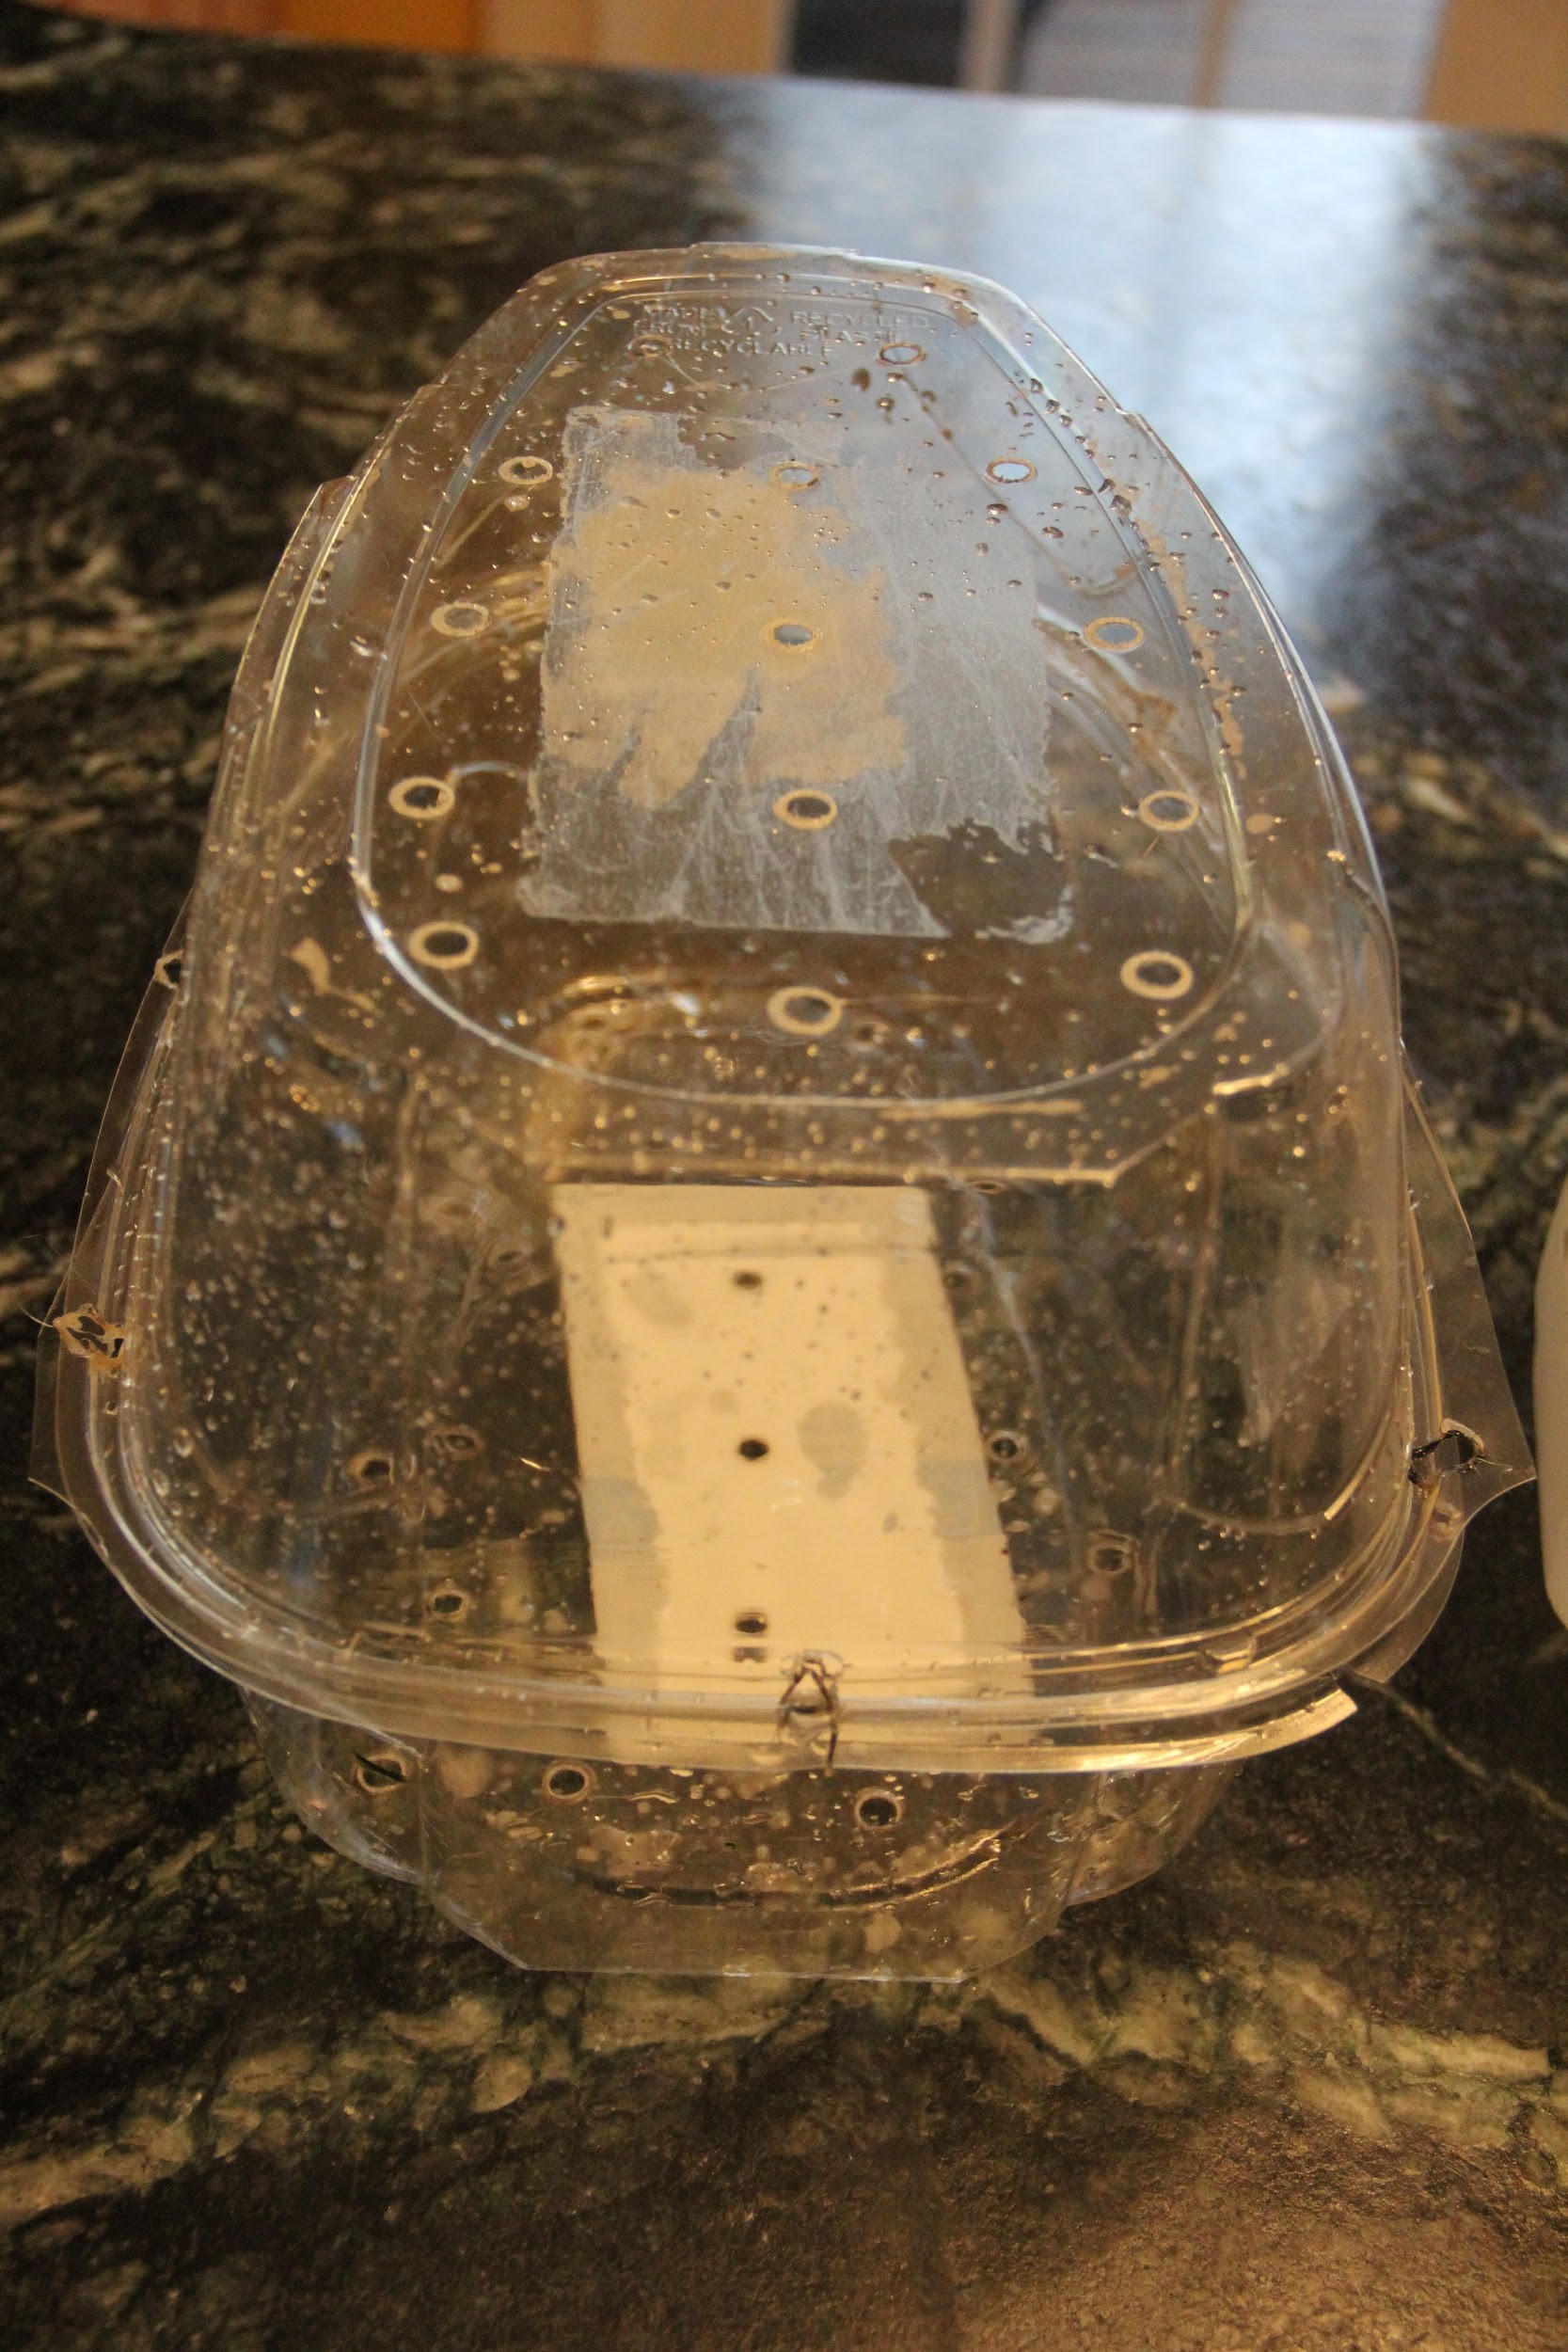
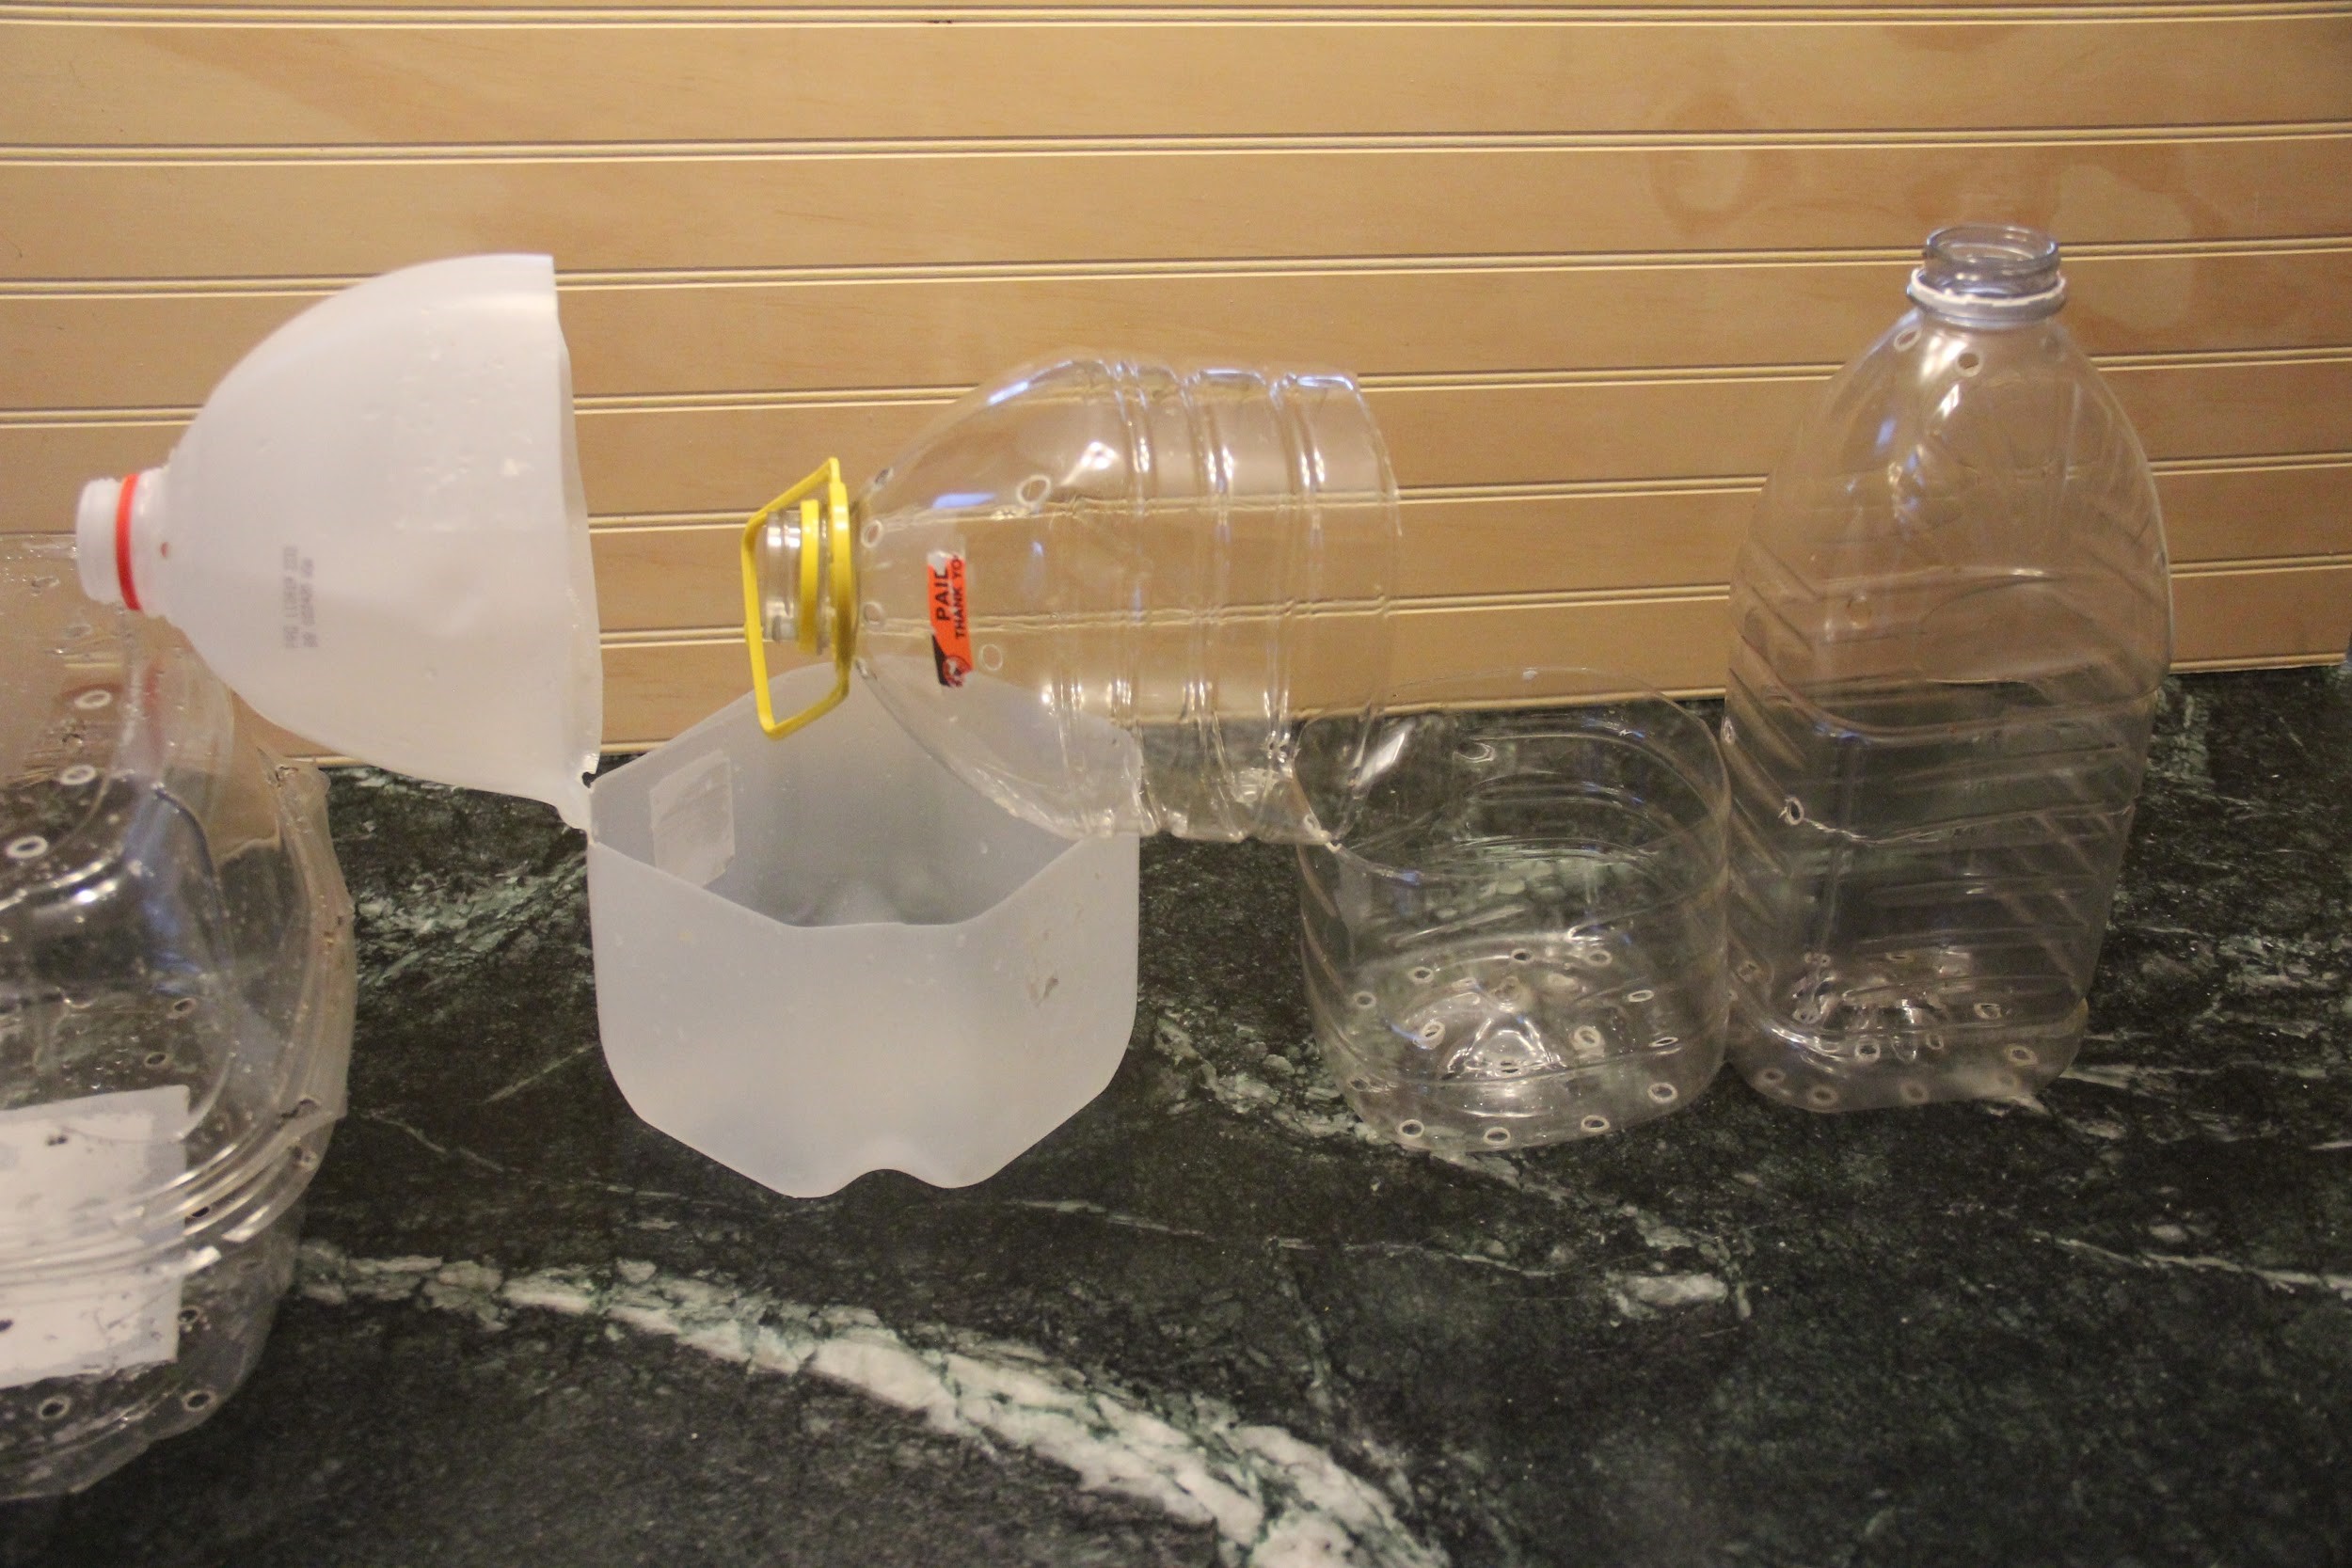
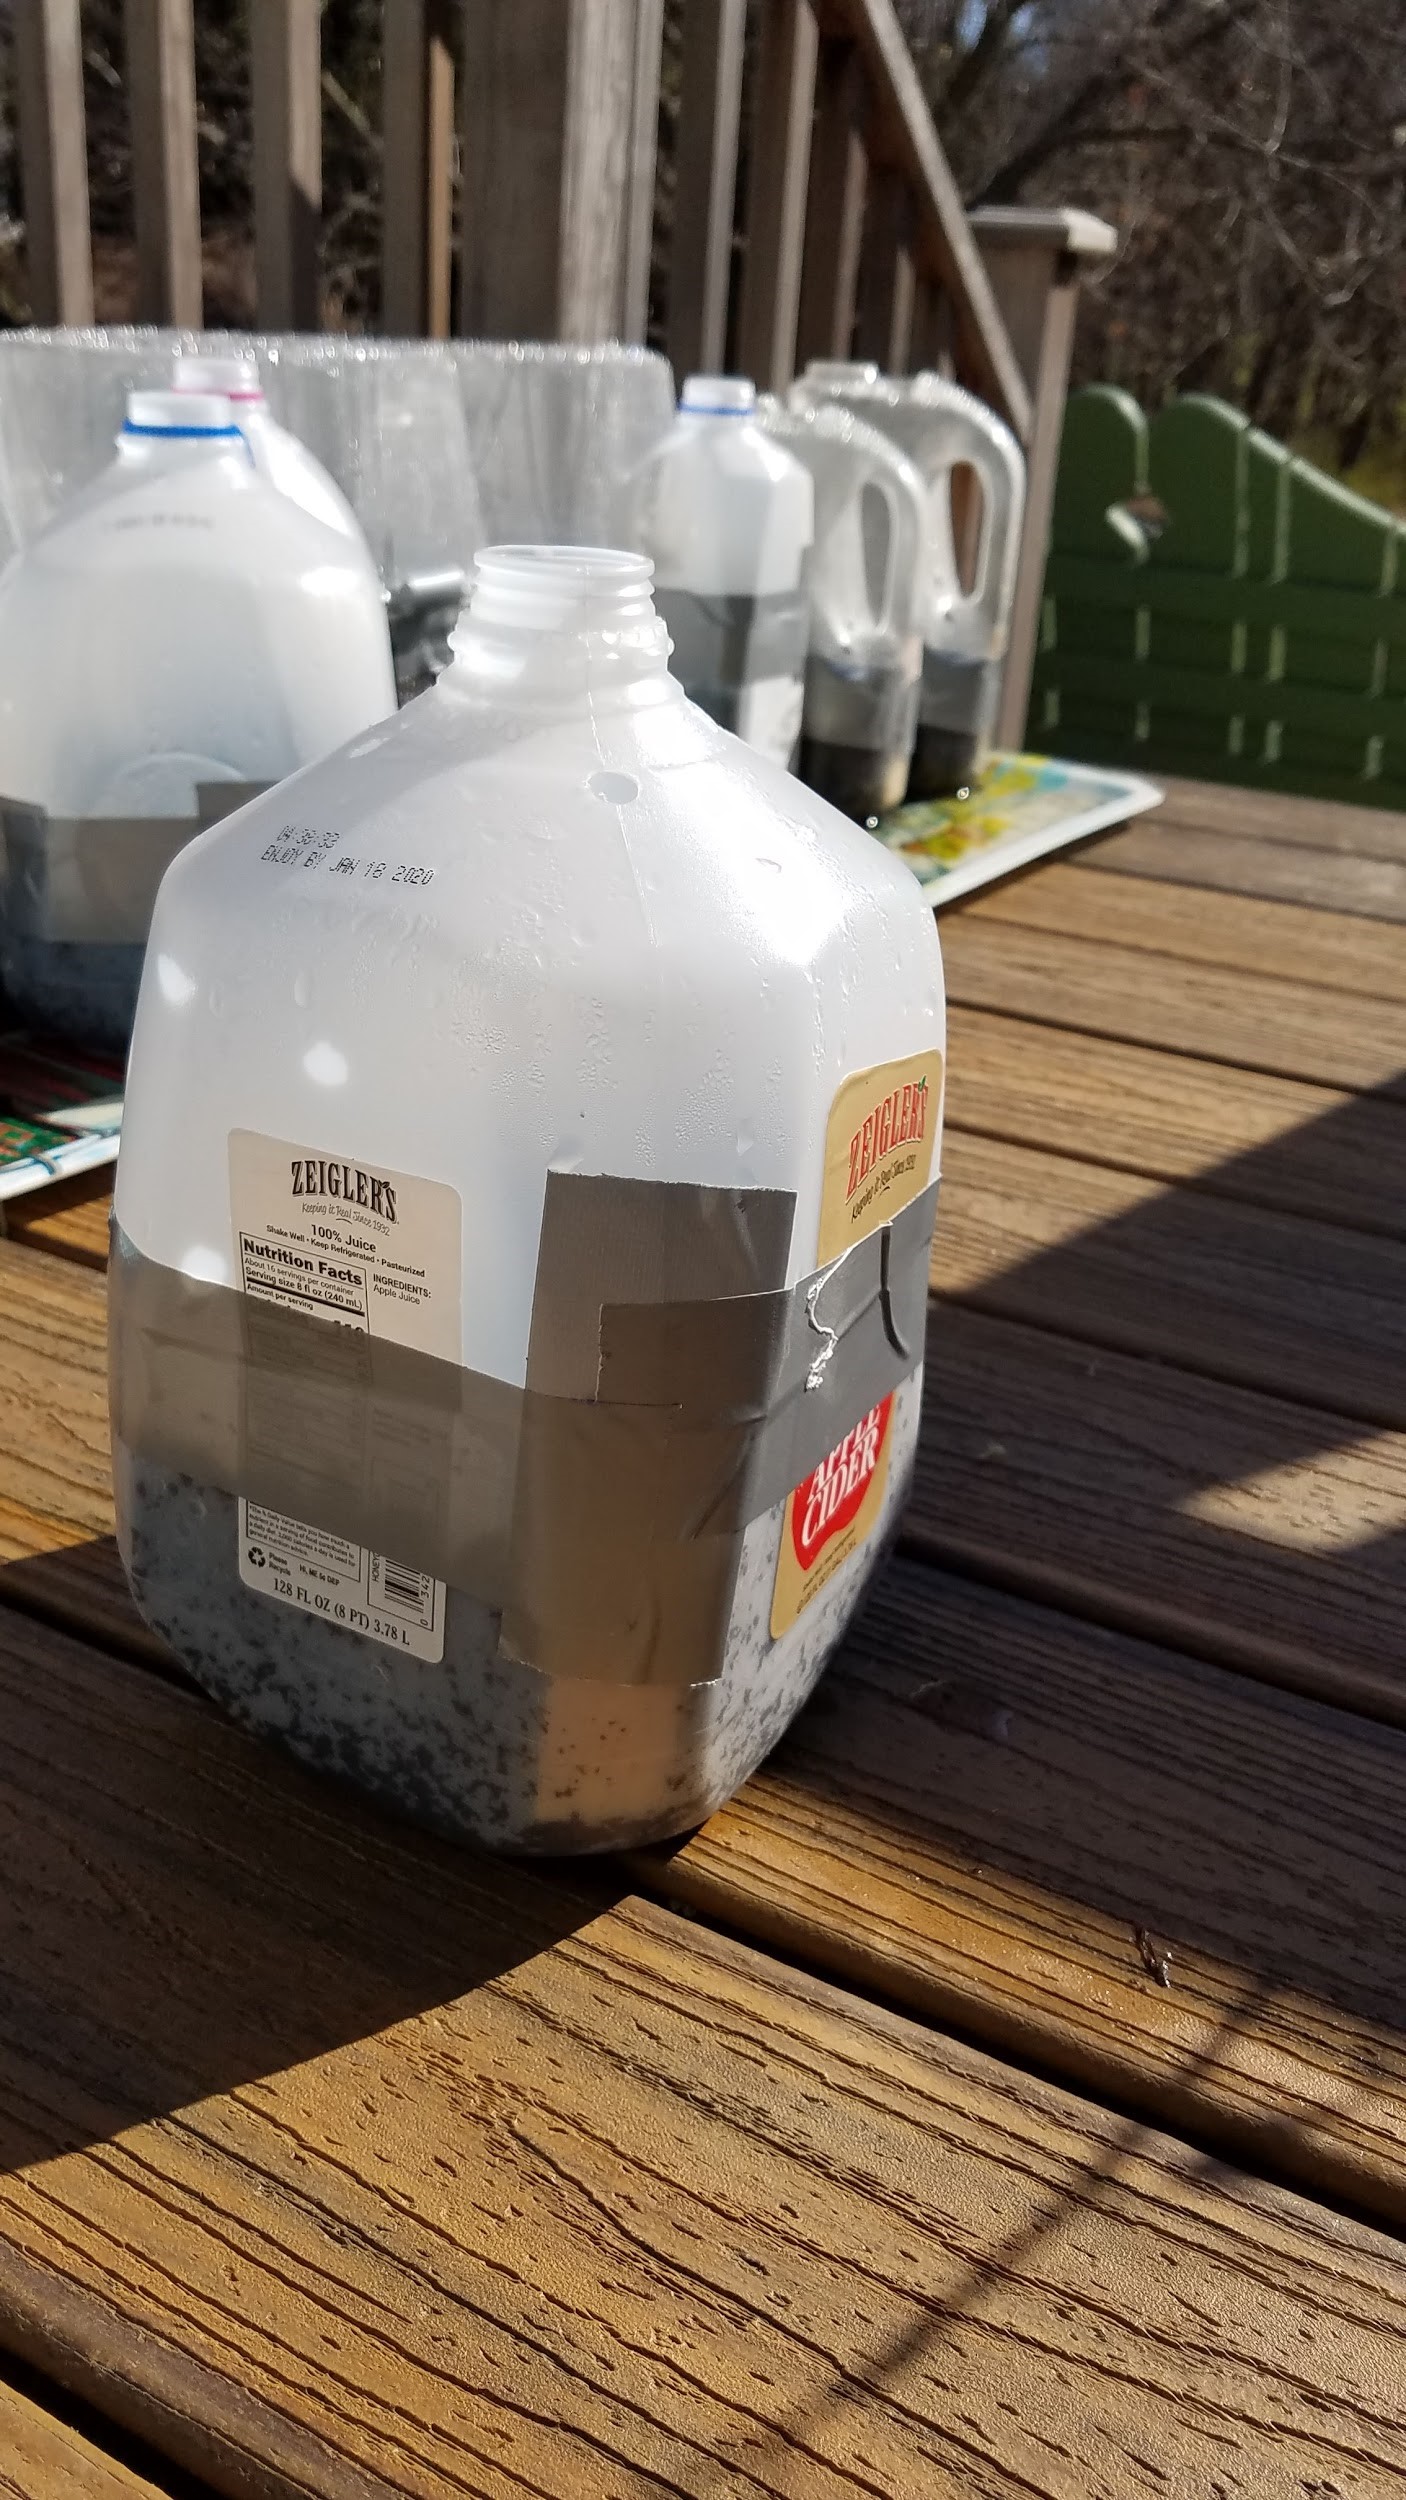
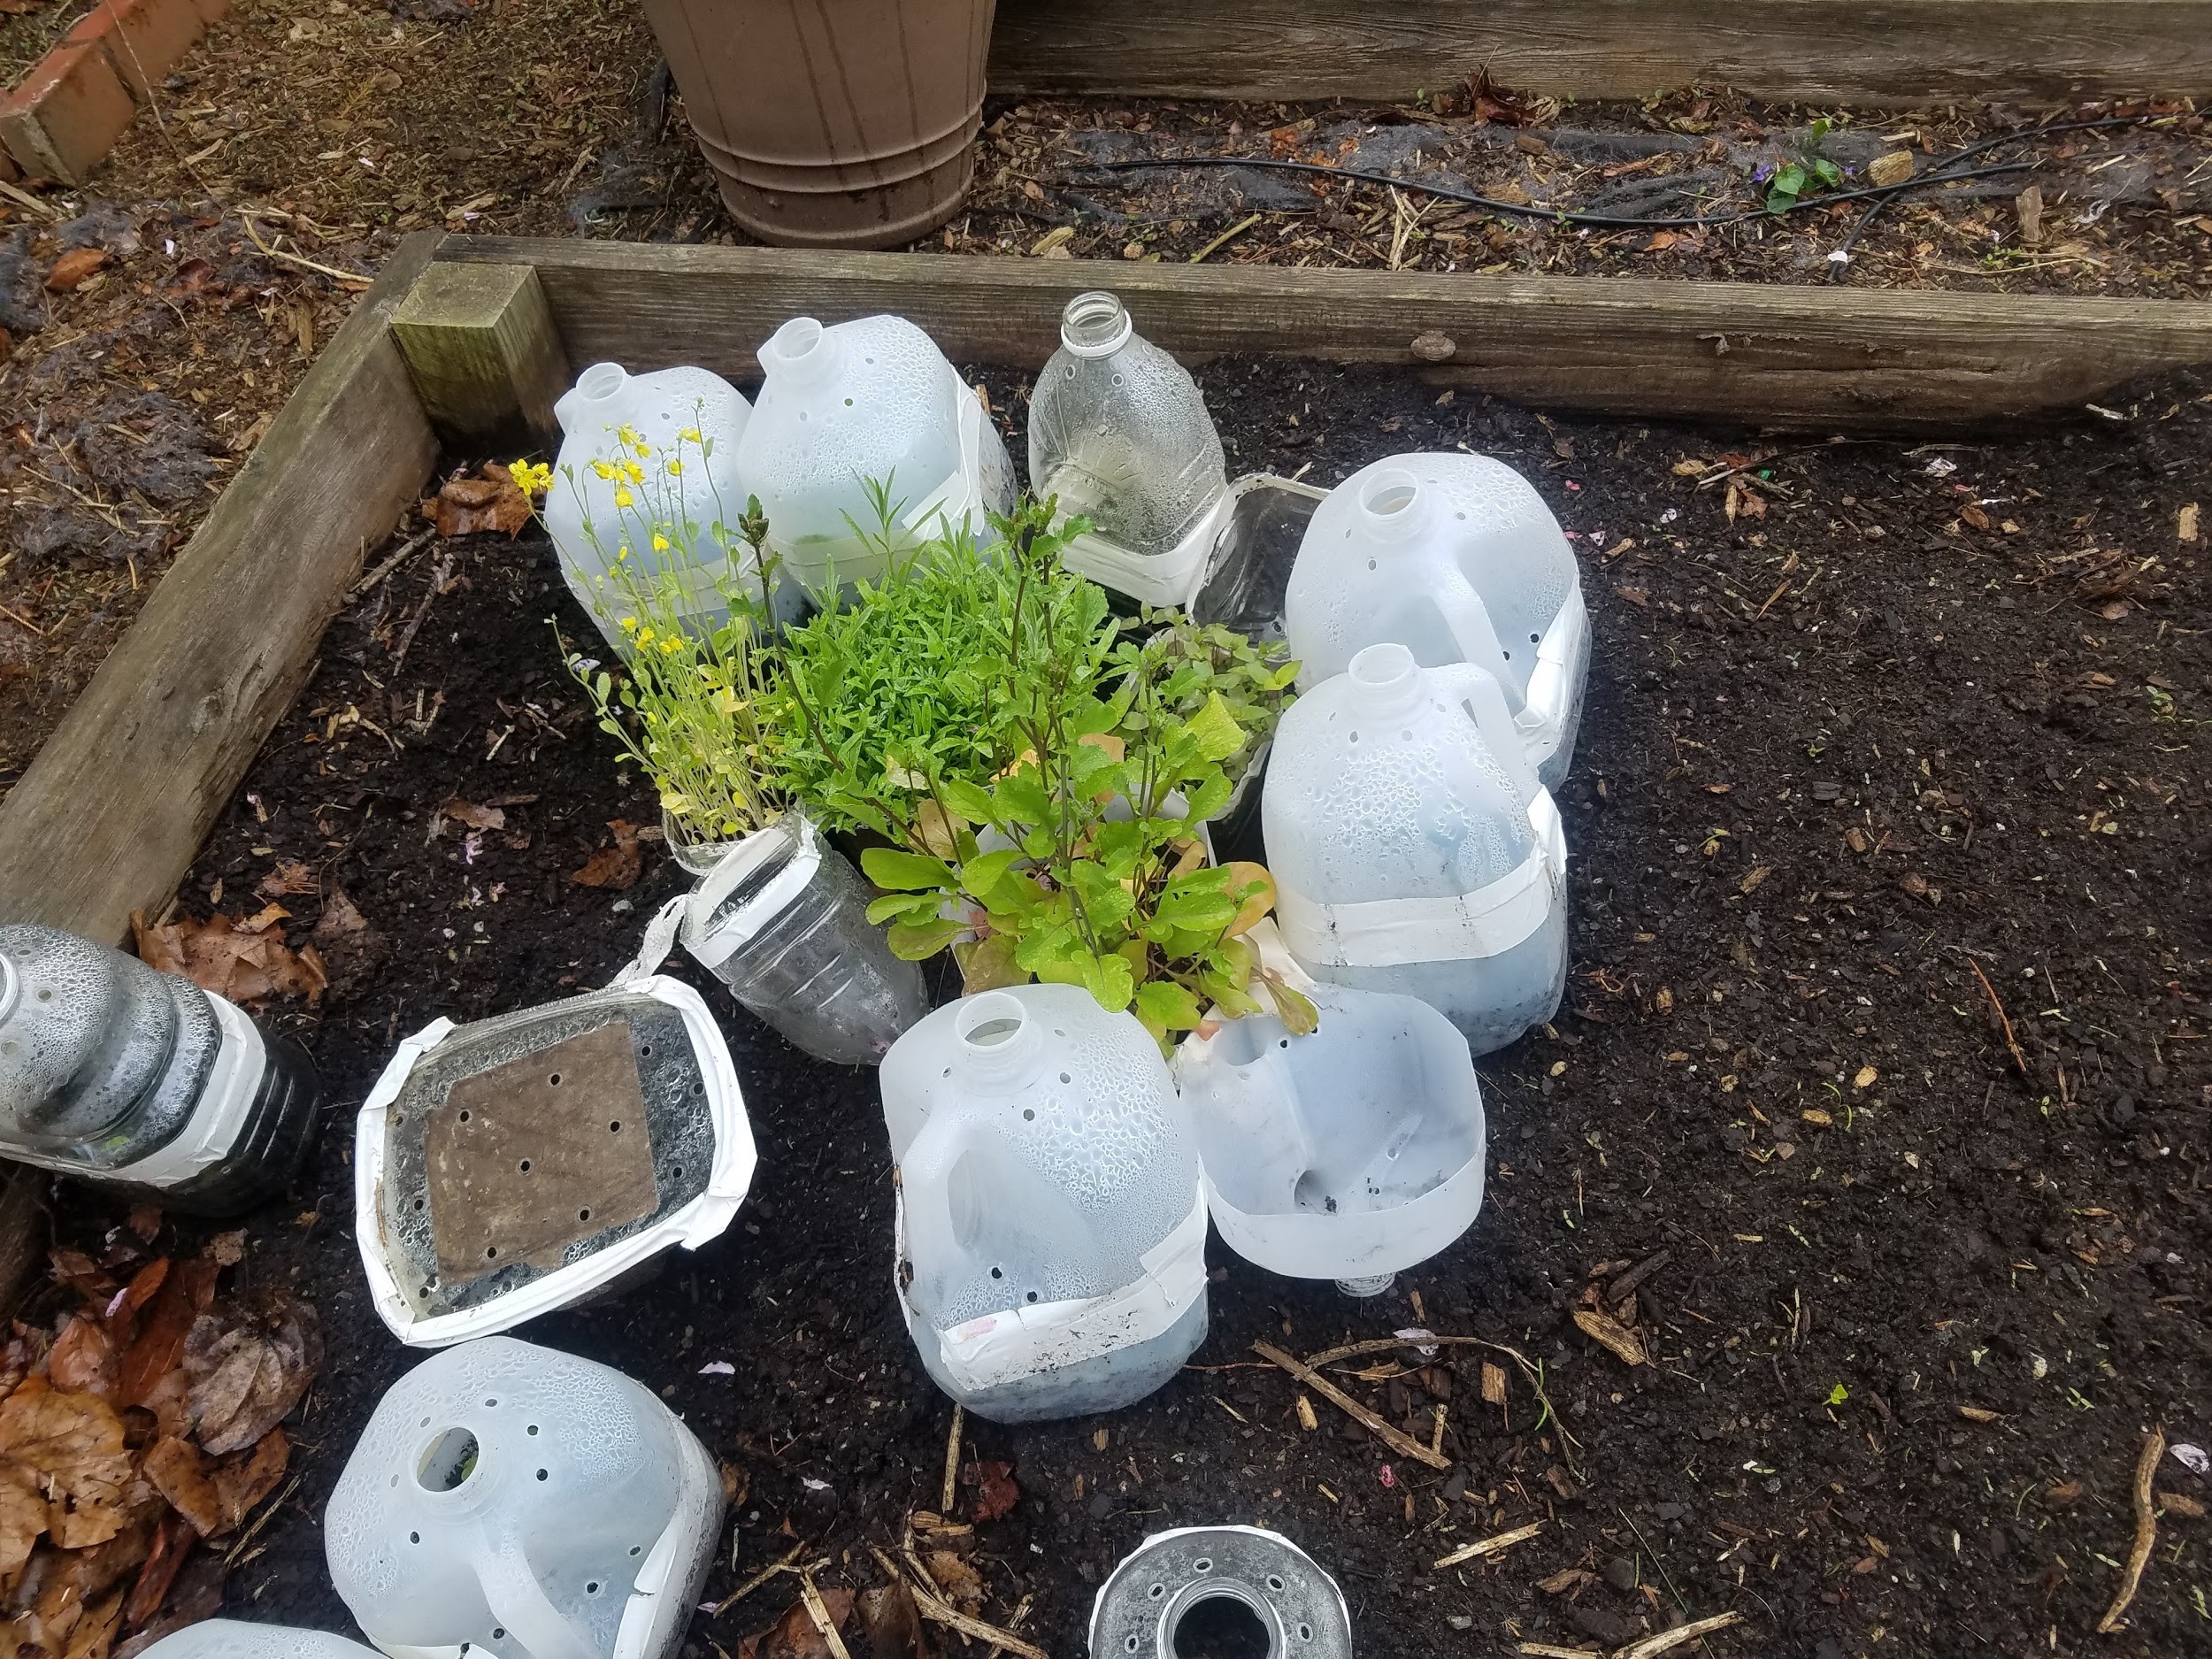
- Rinse the greenhouse container and discard the cap.
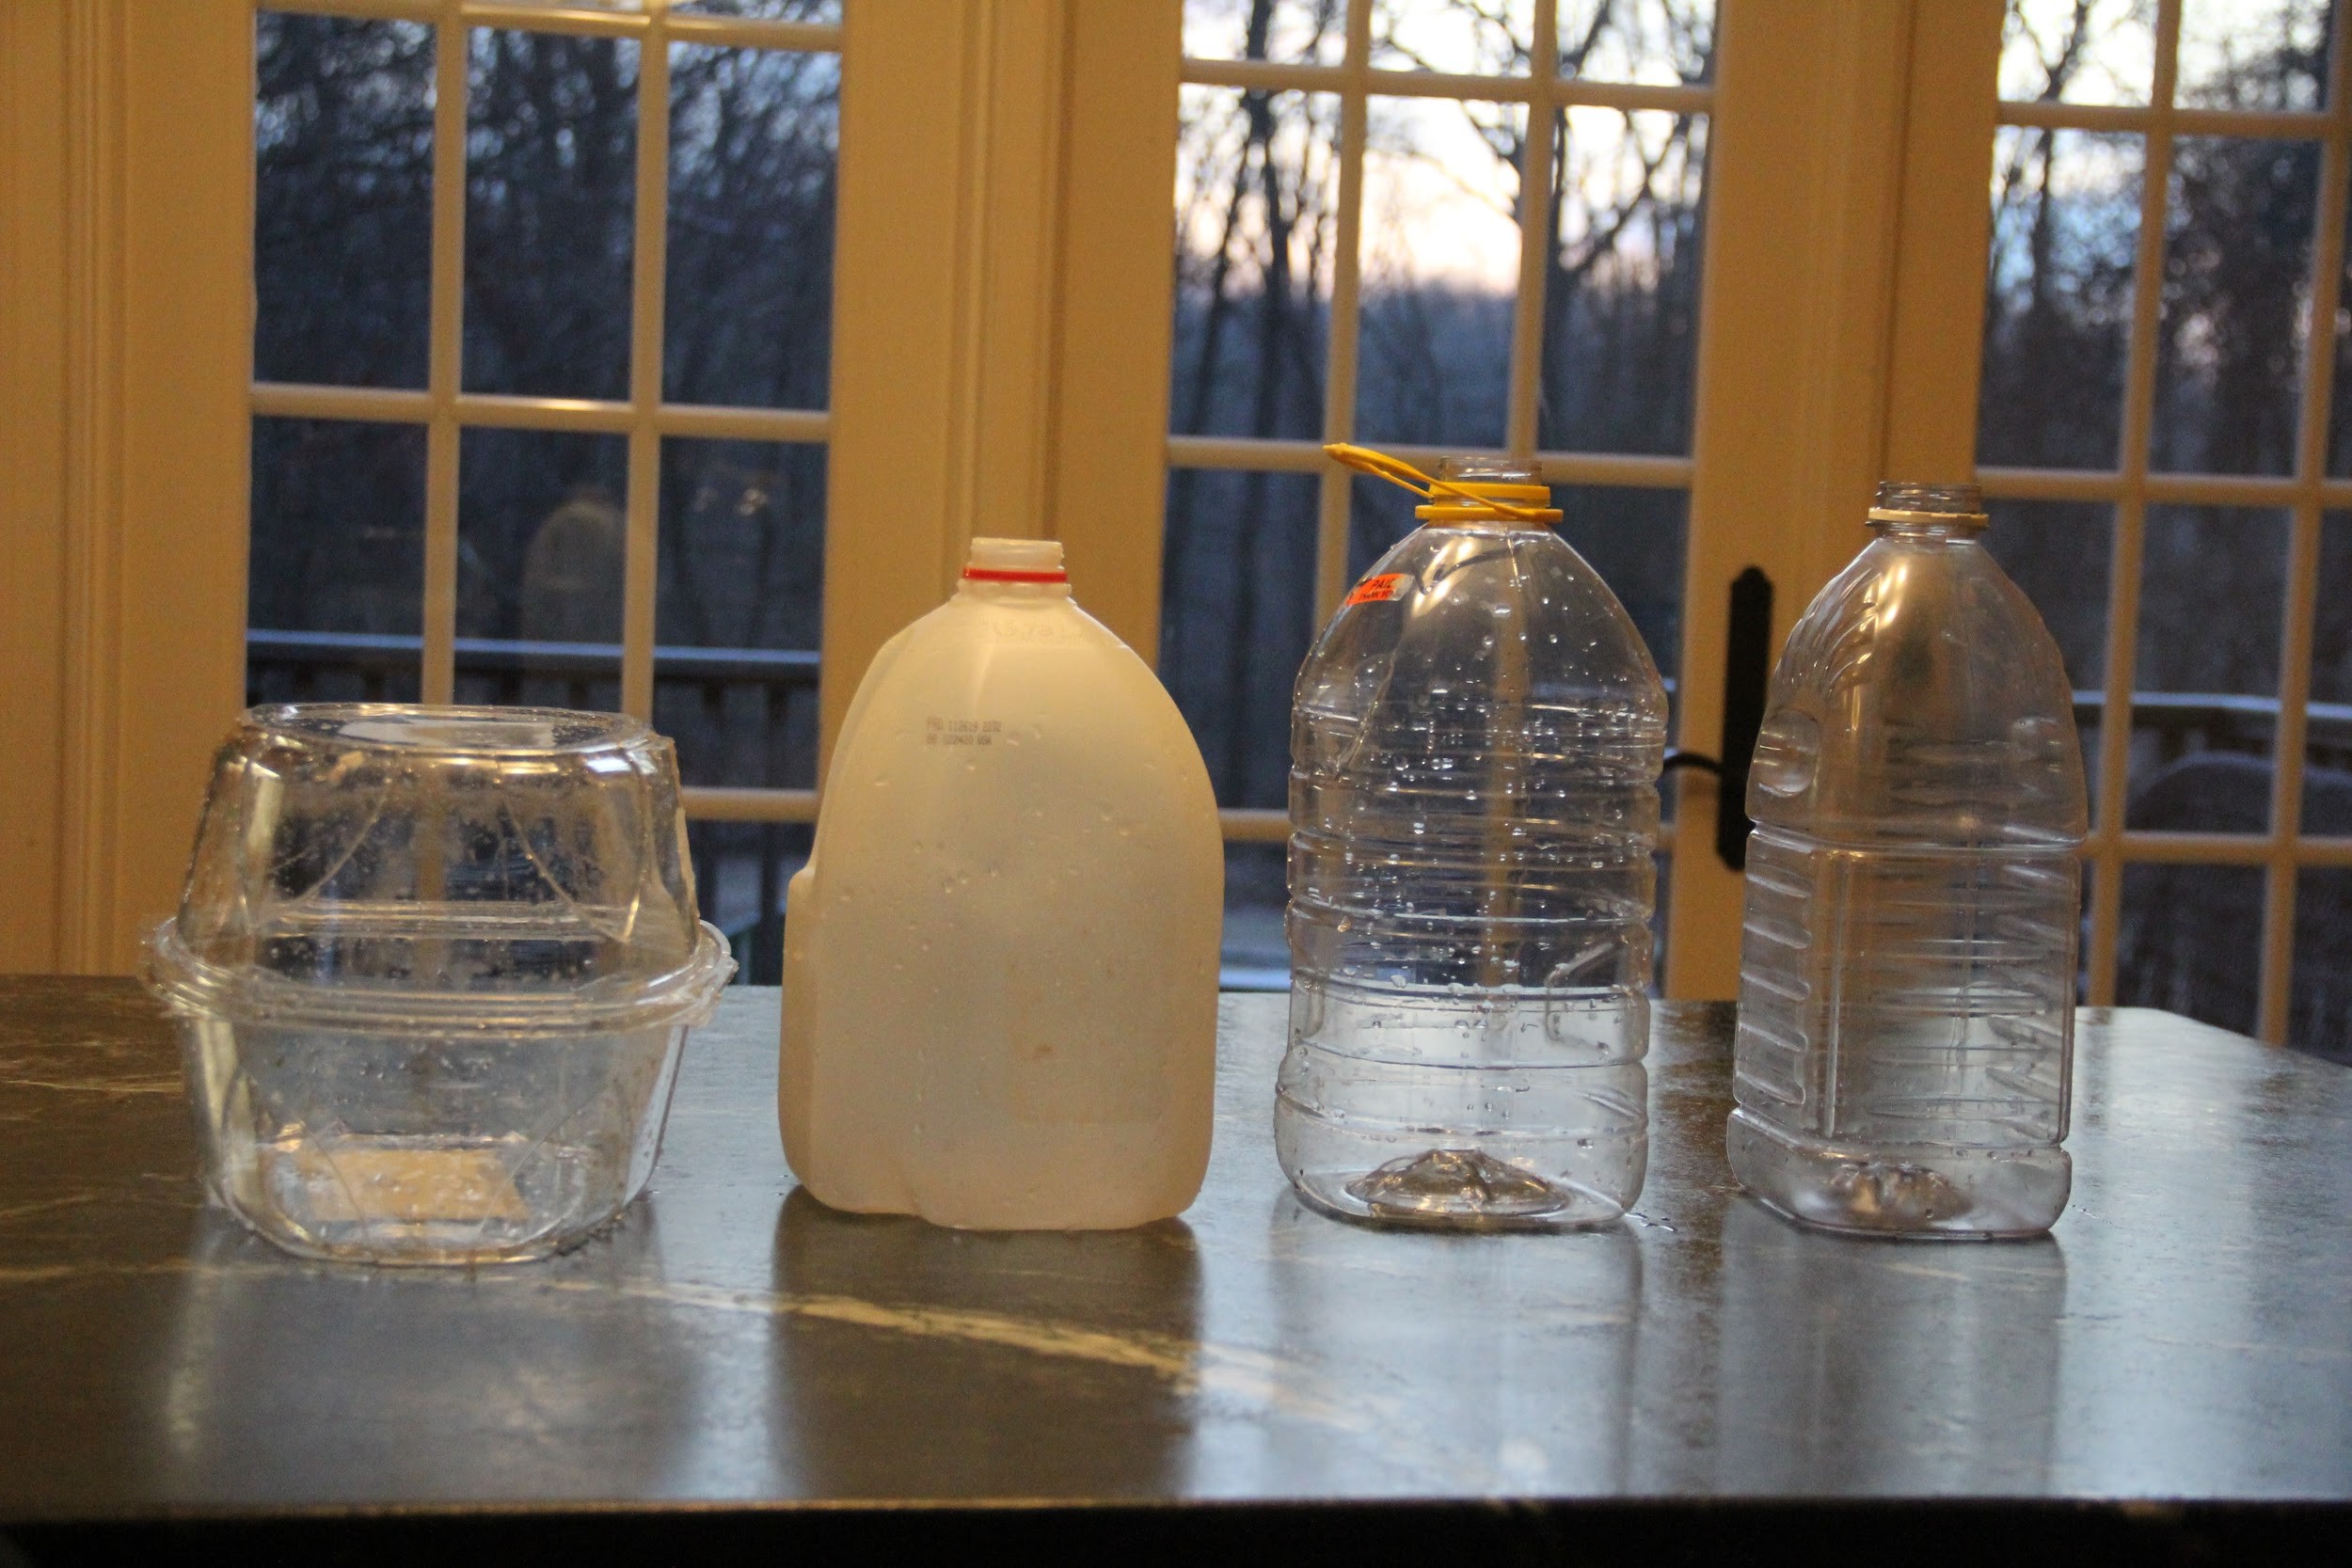
- Using a drill, awl or the hot end of a glue gun add holes for drainage and air. Add some extra vent holes around the collar of the jugs and plenty of vent hole to the top of flat salad containers. Add holes in the bottom for drainage. See examples in the pictures provided. Note: To aid in cutting the containers in half, you may add two holes at least an inch apart under the jug handles or the shorter side of other containers. This makes it easier to start to cut in half then jabbing the end of the scissors in to the container.
- Using scissors carefully cut the container in half, leaving about an inch uncut to act as a hinged lid for the greenhouse. (If the container is completely cut in half, that is ok, the two halves are taped back together in a few steps.)
- Add about 3” of pre-moistened soil to the bottom of the container.
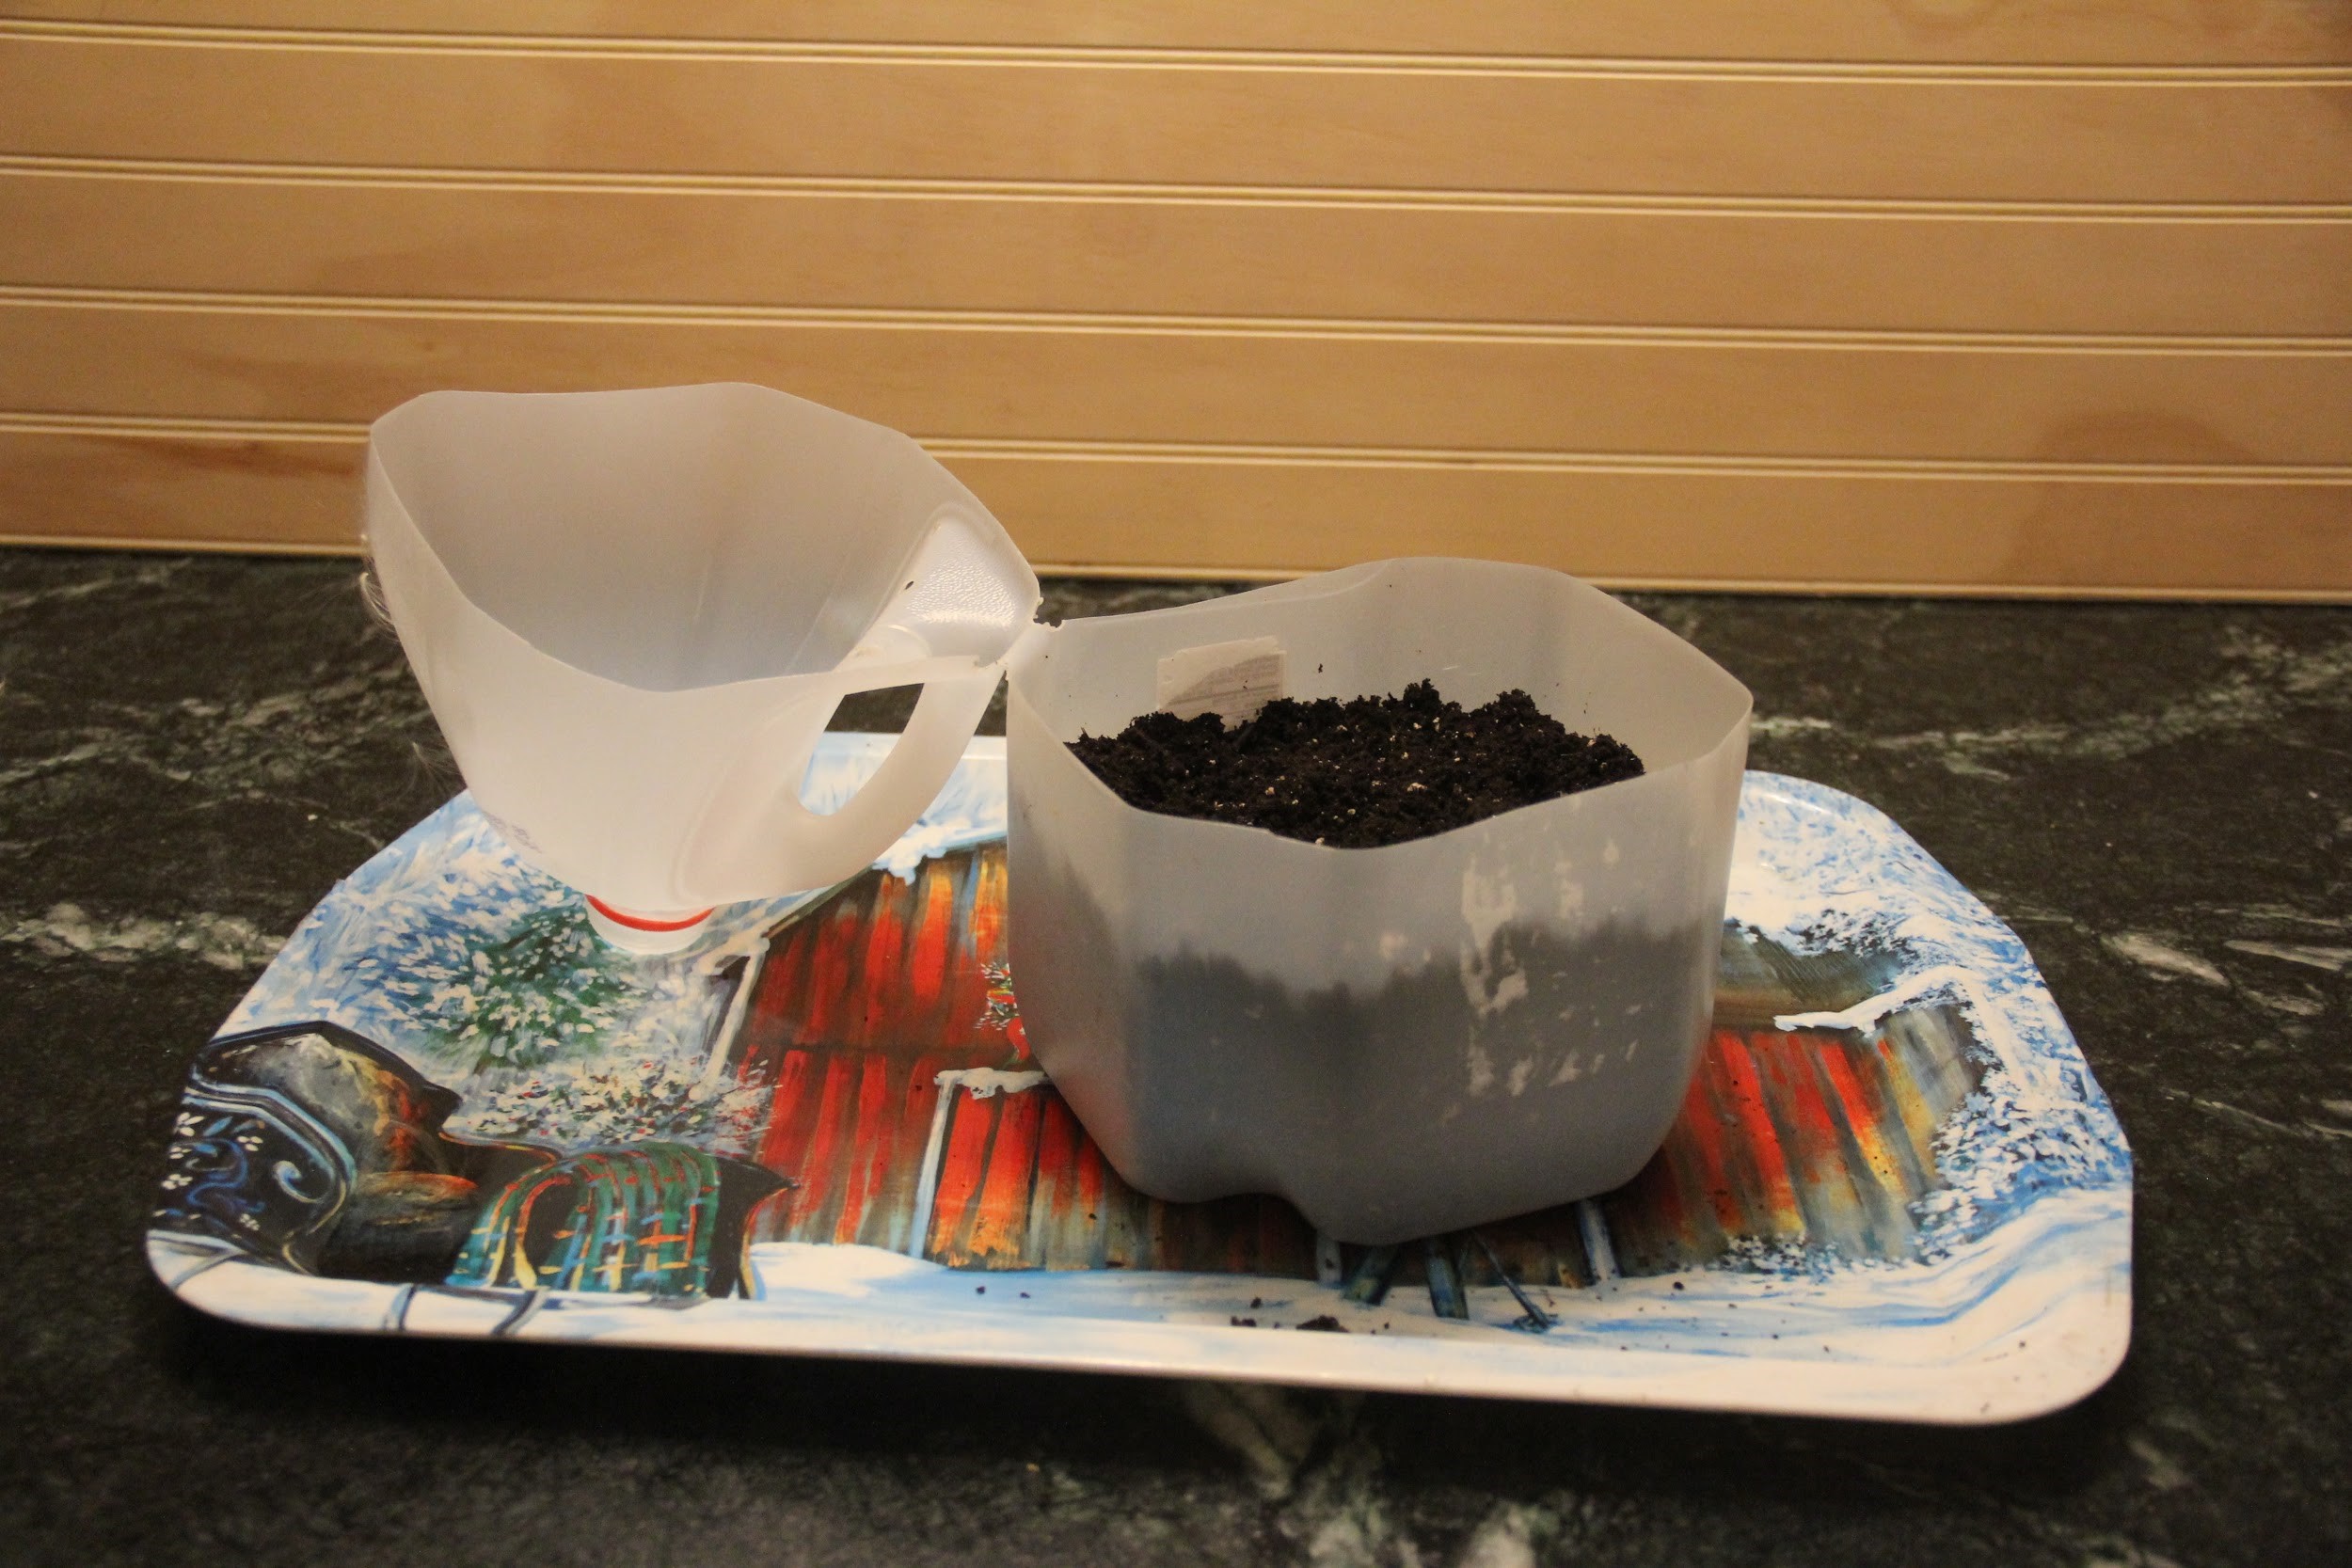
- Label the container – everywhere! A plant marker can be labeled and placed inside the container. The container can be labeled on the outside with a permanent marker. Letters or numbers can be used to correspond to a list of plants. For example, an A in the container corresponds to Spinach on the list or an 8 corresponds to Snapdragons.
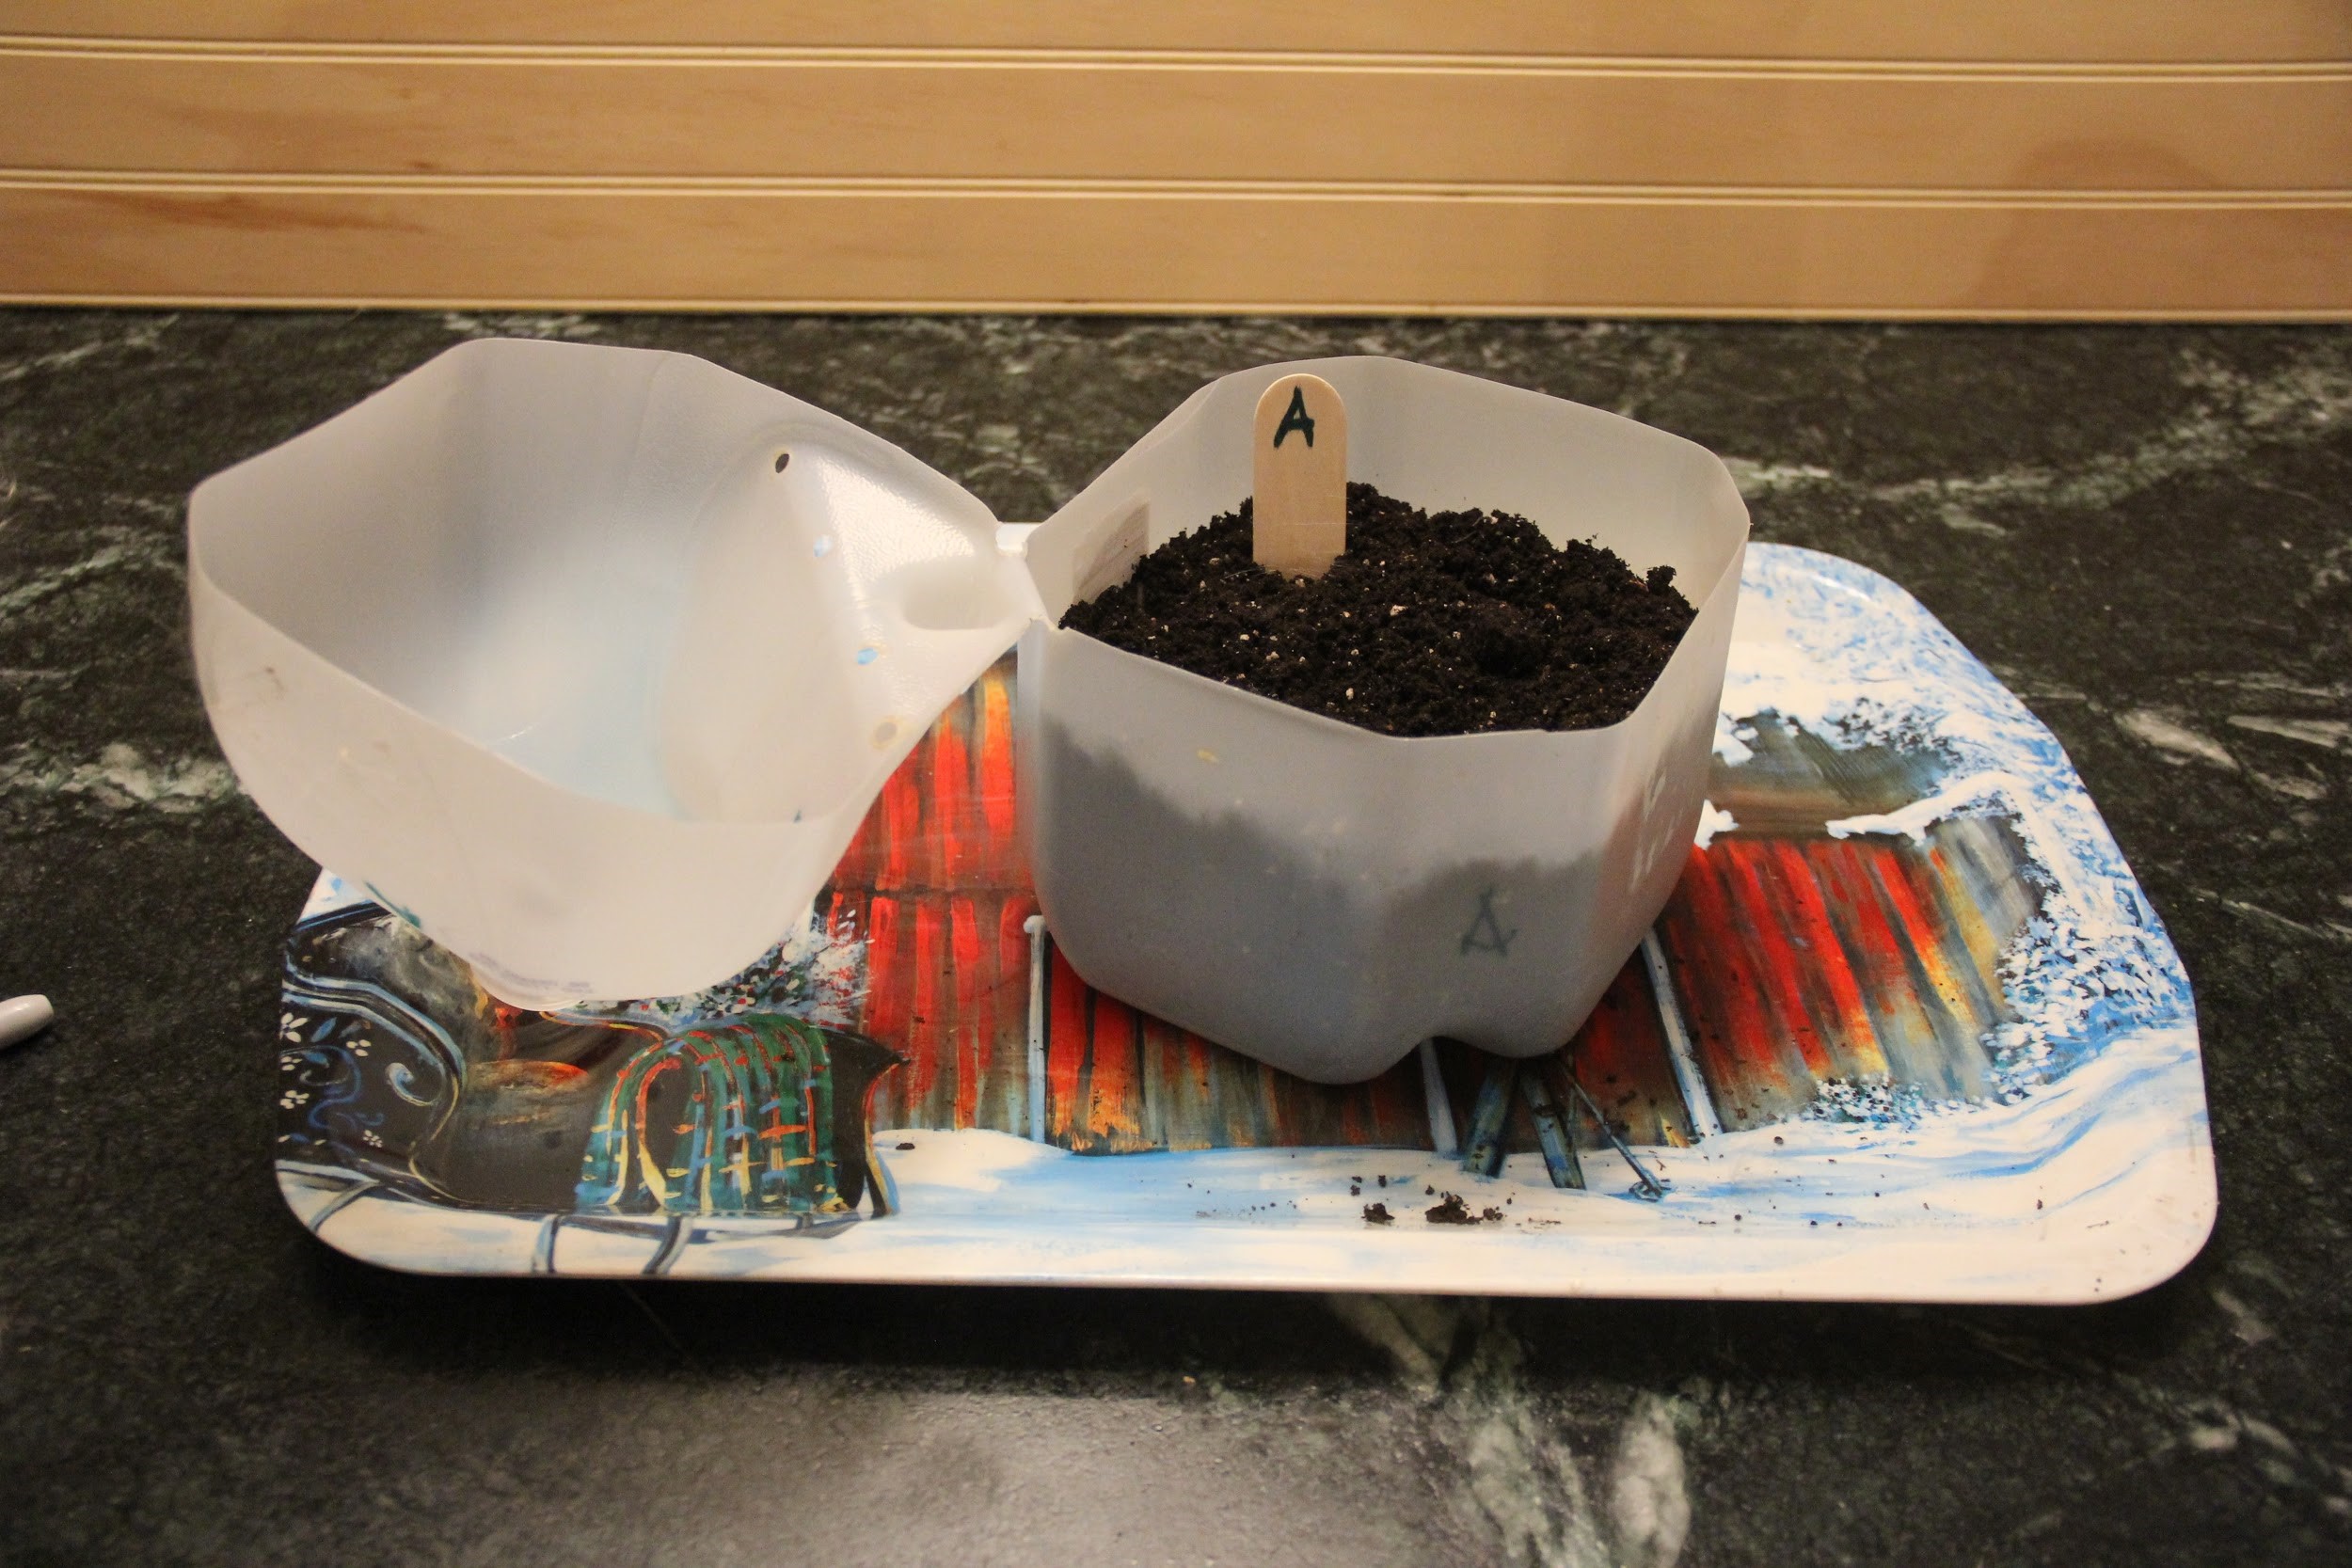
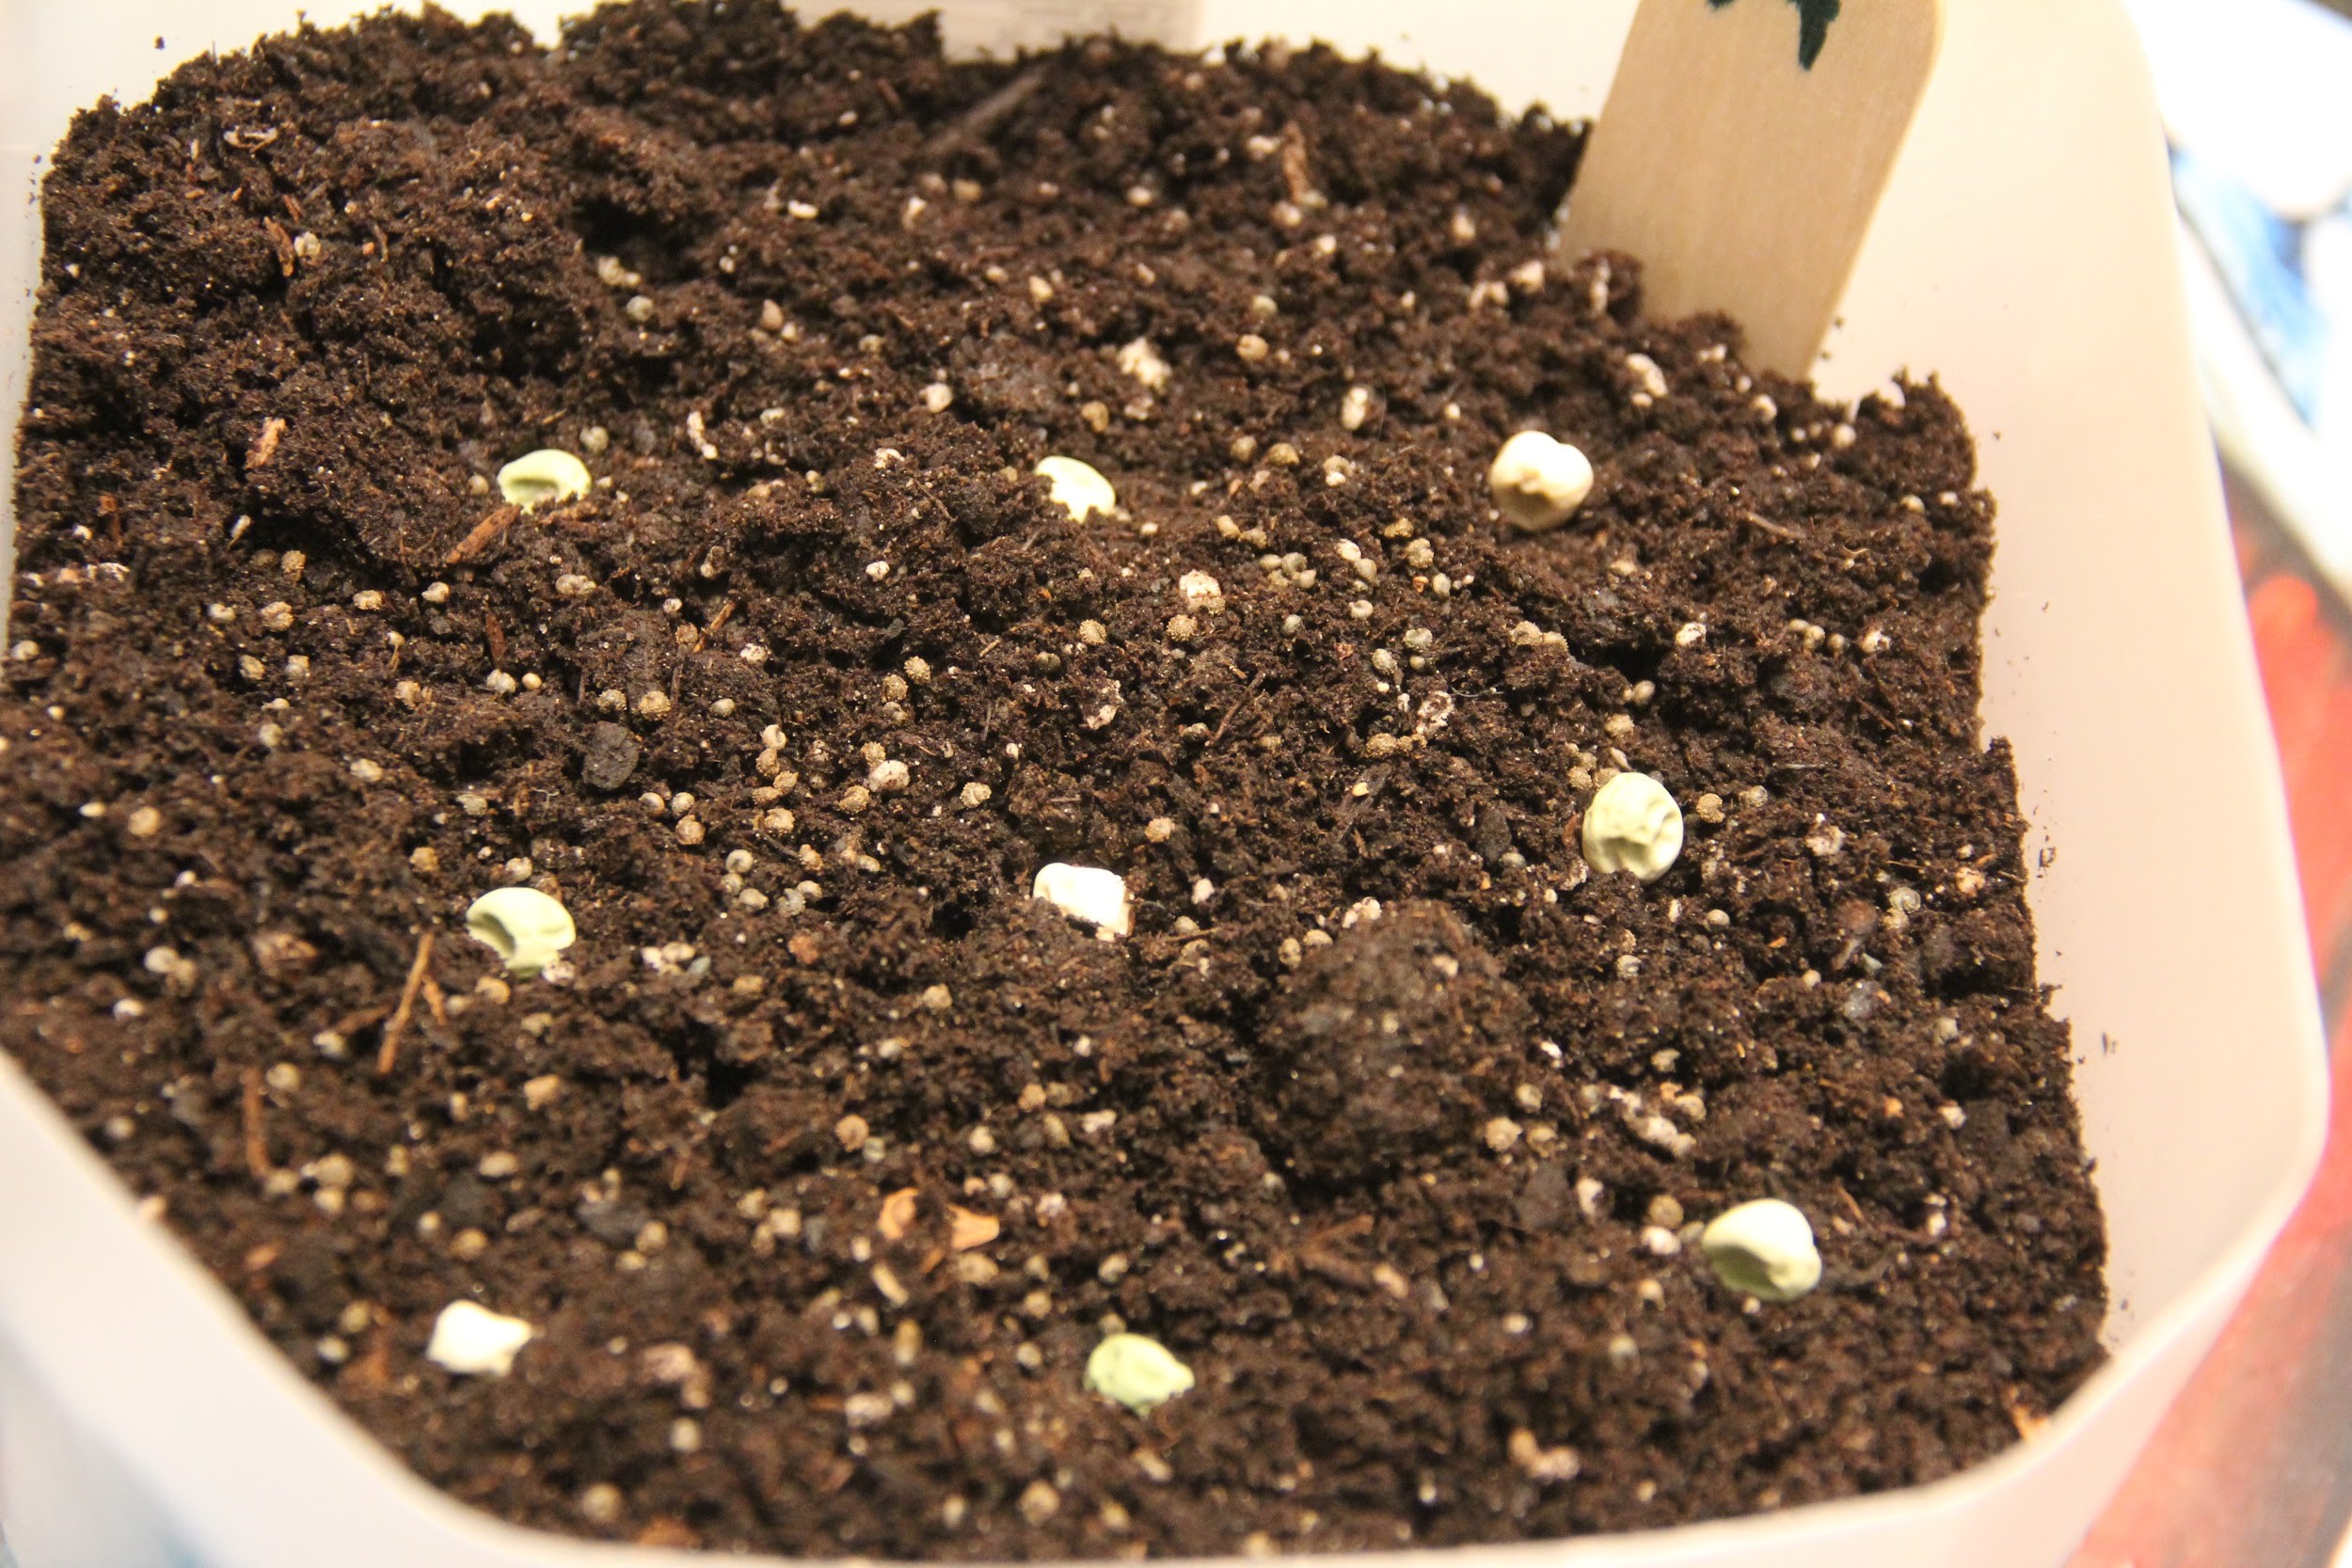
- Sow the seeds! Larger seeds can be gently pressed into the surface of the soil. Small seeds can simply be scattered on the surface. The rule of thumb is to sow the seeds no more than one and a half times the length of the seed. It is best to err on the shallow side, otherwise your seed may not germinate.
Seeds to Try:
| Annuals | alyssum, bidens aurea, calendula, celosia, chamomile, cosmos, datura, dahlia, gaillardia, helianthus, lavatera, linaria, morning glory, mirabilis, nicotiana, petunia, portulaca, rudbeckia, snapdragon, viola |
| Perennials | asclepias, bellis, digitalis, echinacea, flax, gaura, grasses, heuchera, helenium, liatris, malva, nepeta, oenothera, poppy, salvia, torch lily, yarrow |
| Herbs | basil, chamomile, chives, cilantro, dill, hyssop, lavender, marjoram, mint, oregano, parsley, sage, thyme |
| Vegetables | beets, broccoli, brussel sprouts, cabbage,cauliflower, carrots, celery, endive, hot peppers, kale, kohlrabi, lettuce, mustard, onions, radish, spinach, strawberries, tomatoes, turnip, winter squash |
- Attach the top of the container to the bottom of the container with duct tape or ties. First align the top and bottom with a piece of tape on the side opposite of the hinge. Then tape the rest of the seam.
- Leave the containers on a tray with water overnight to moisten the soil.
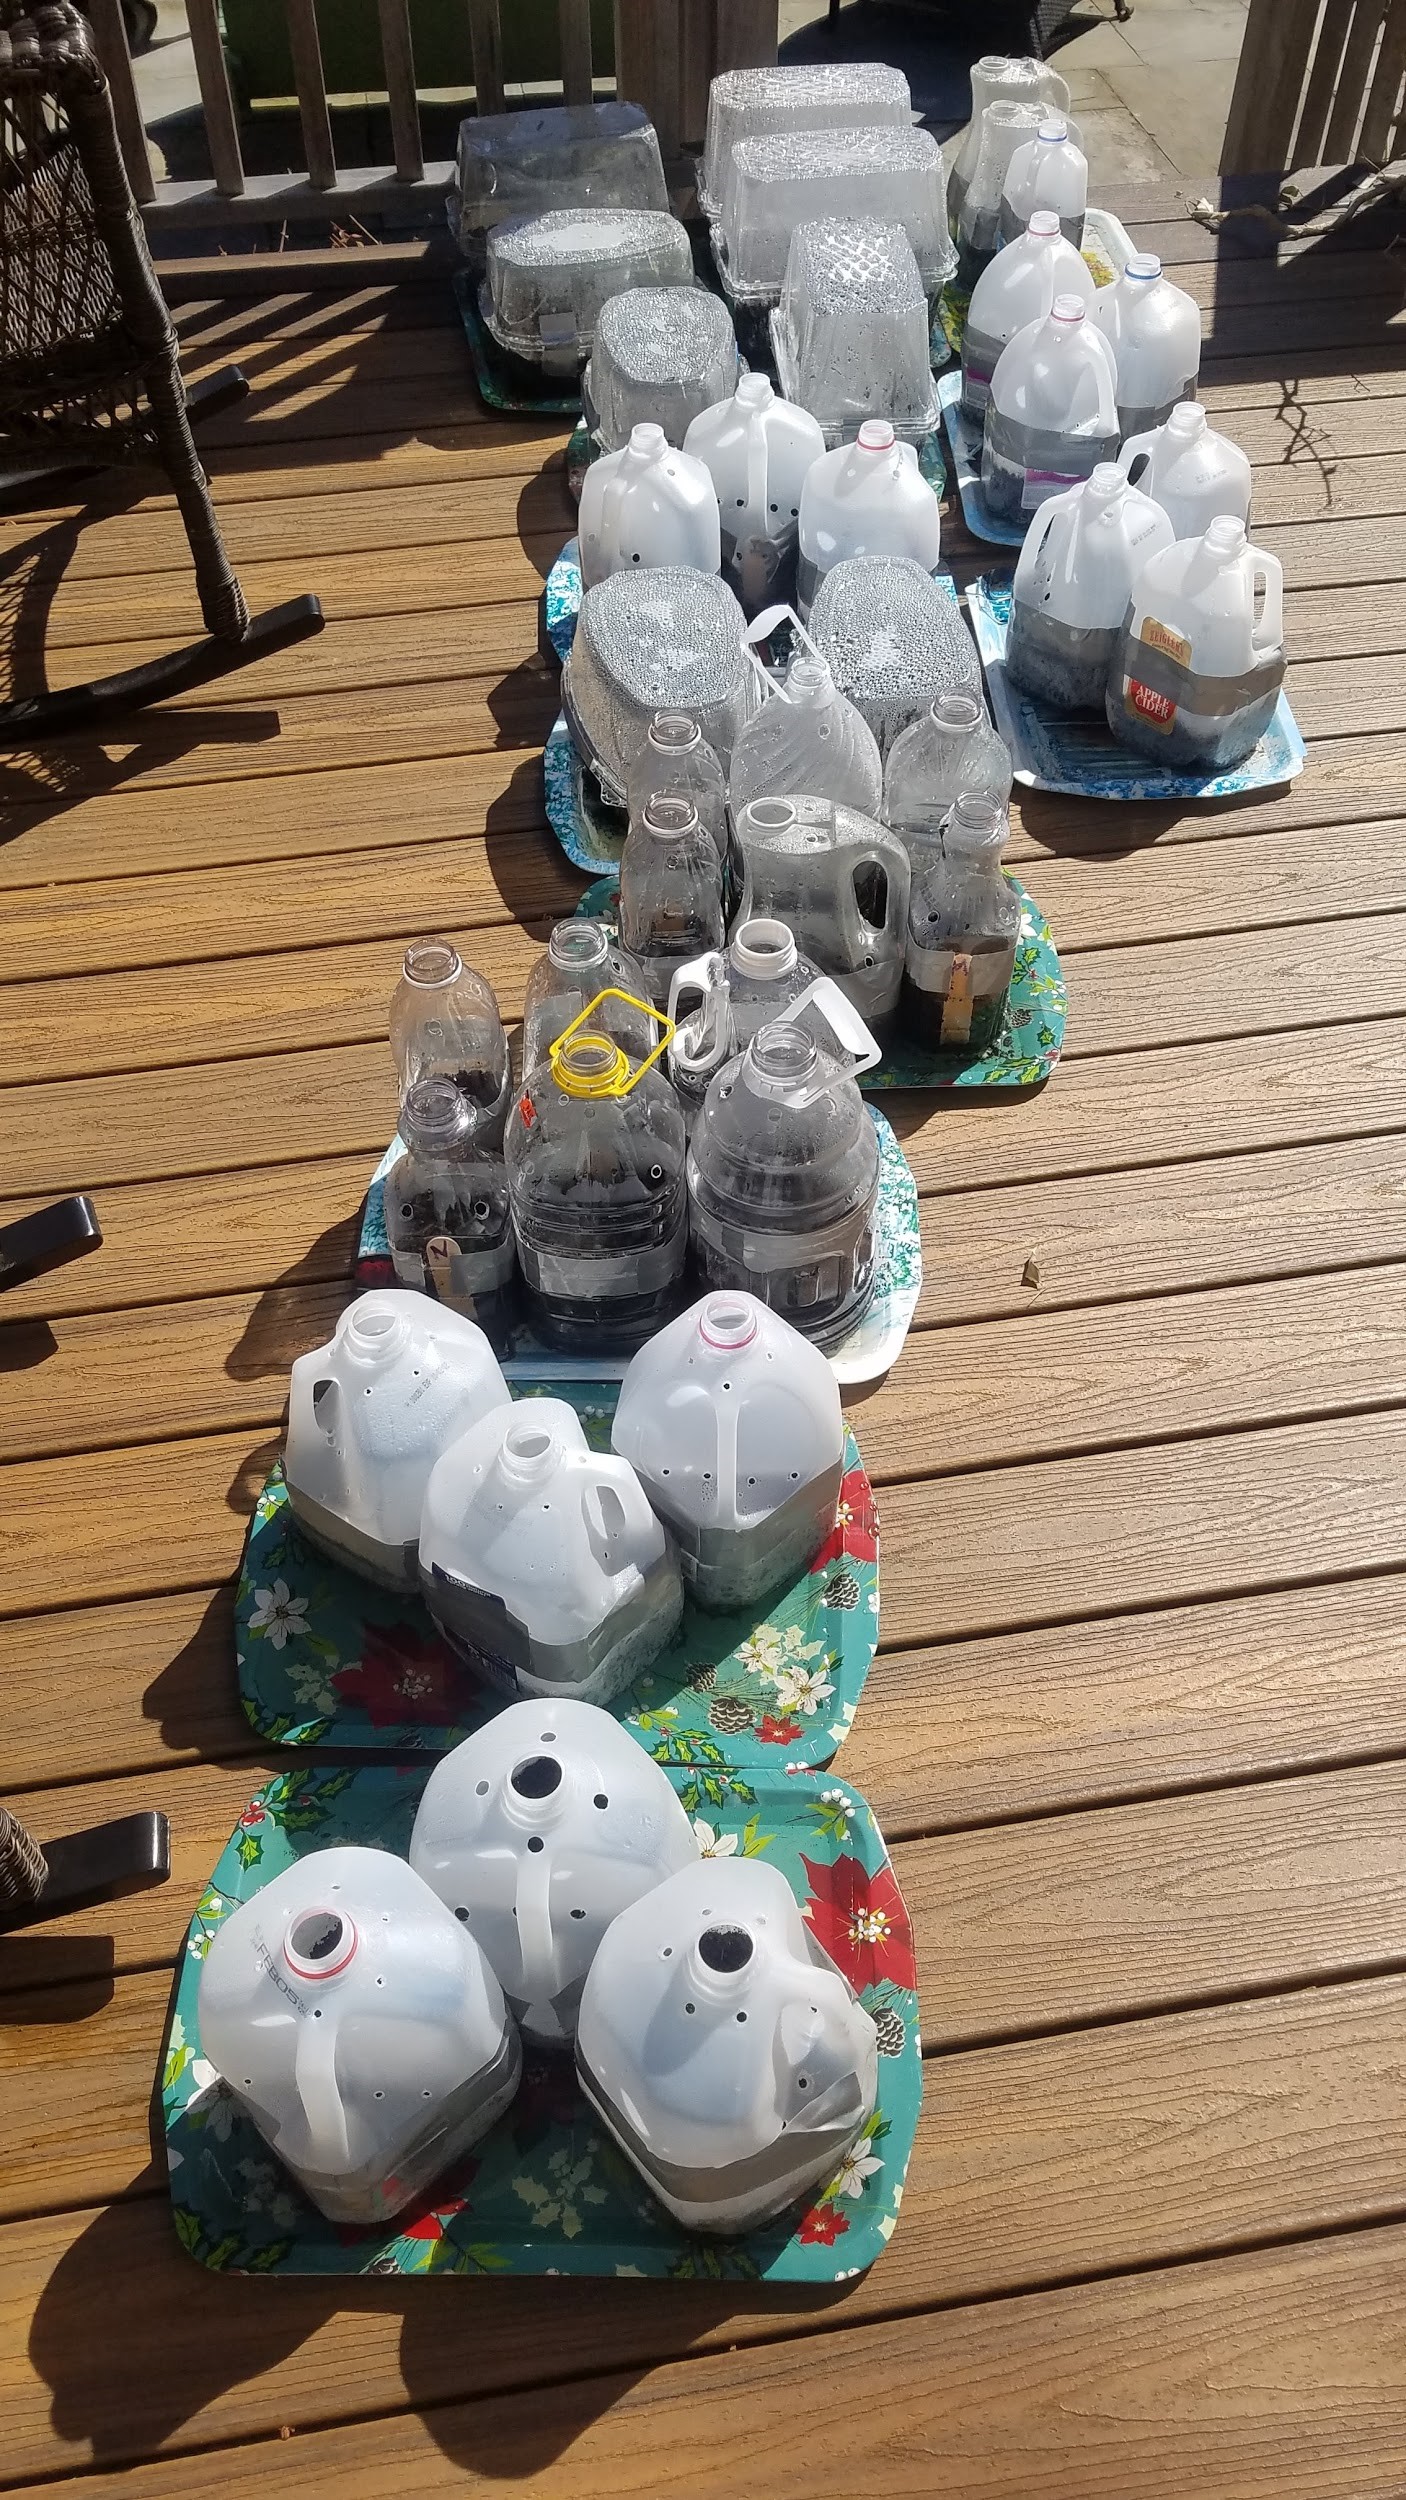
- Place the containers outside in a sunny area where they will experience all of the elements: sun, wind, rain and maybe snow. In case the sun bleaches out the labeling on the container, draw a map of the containers and their labels. Now the hardest part…..waiting!
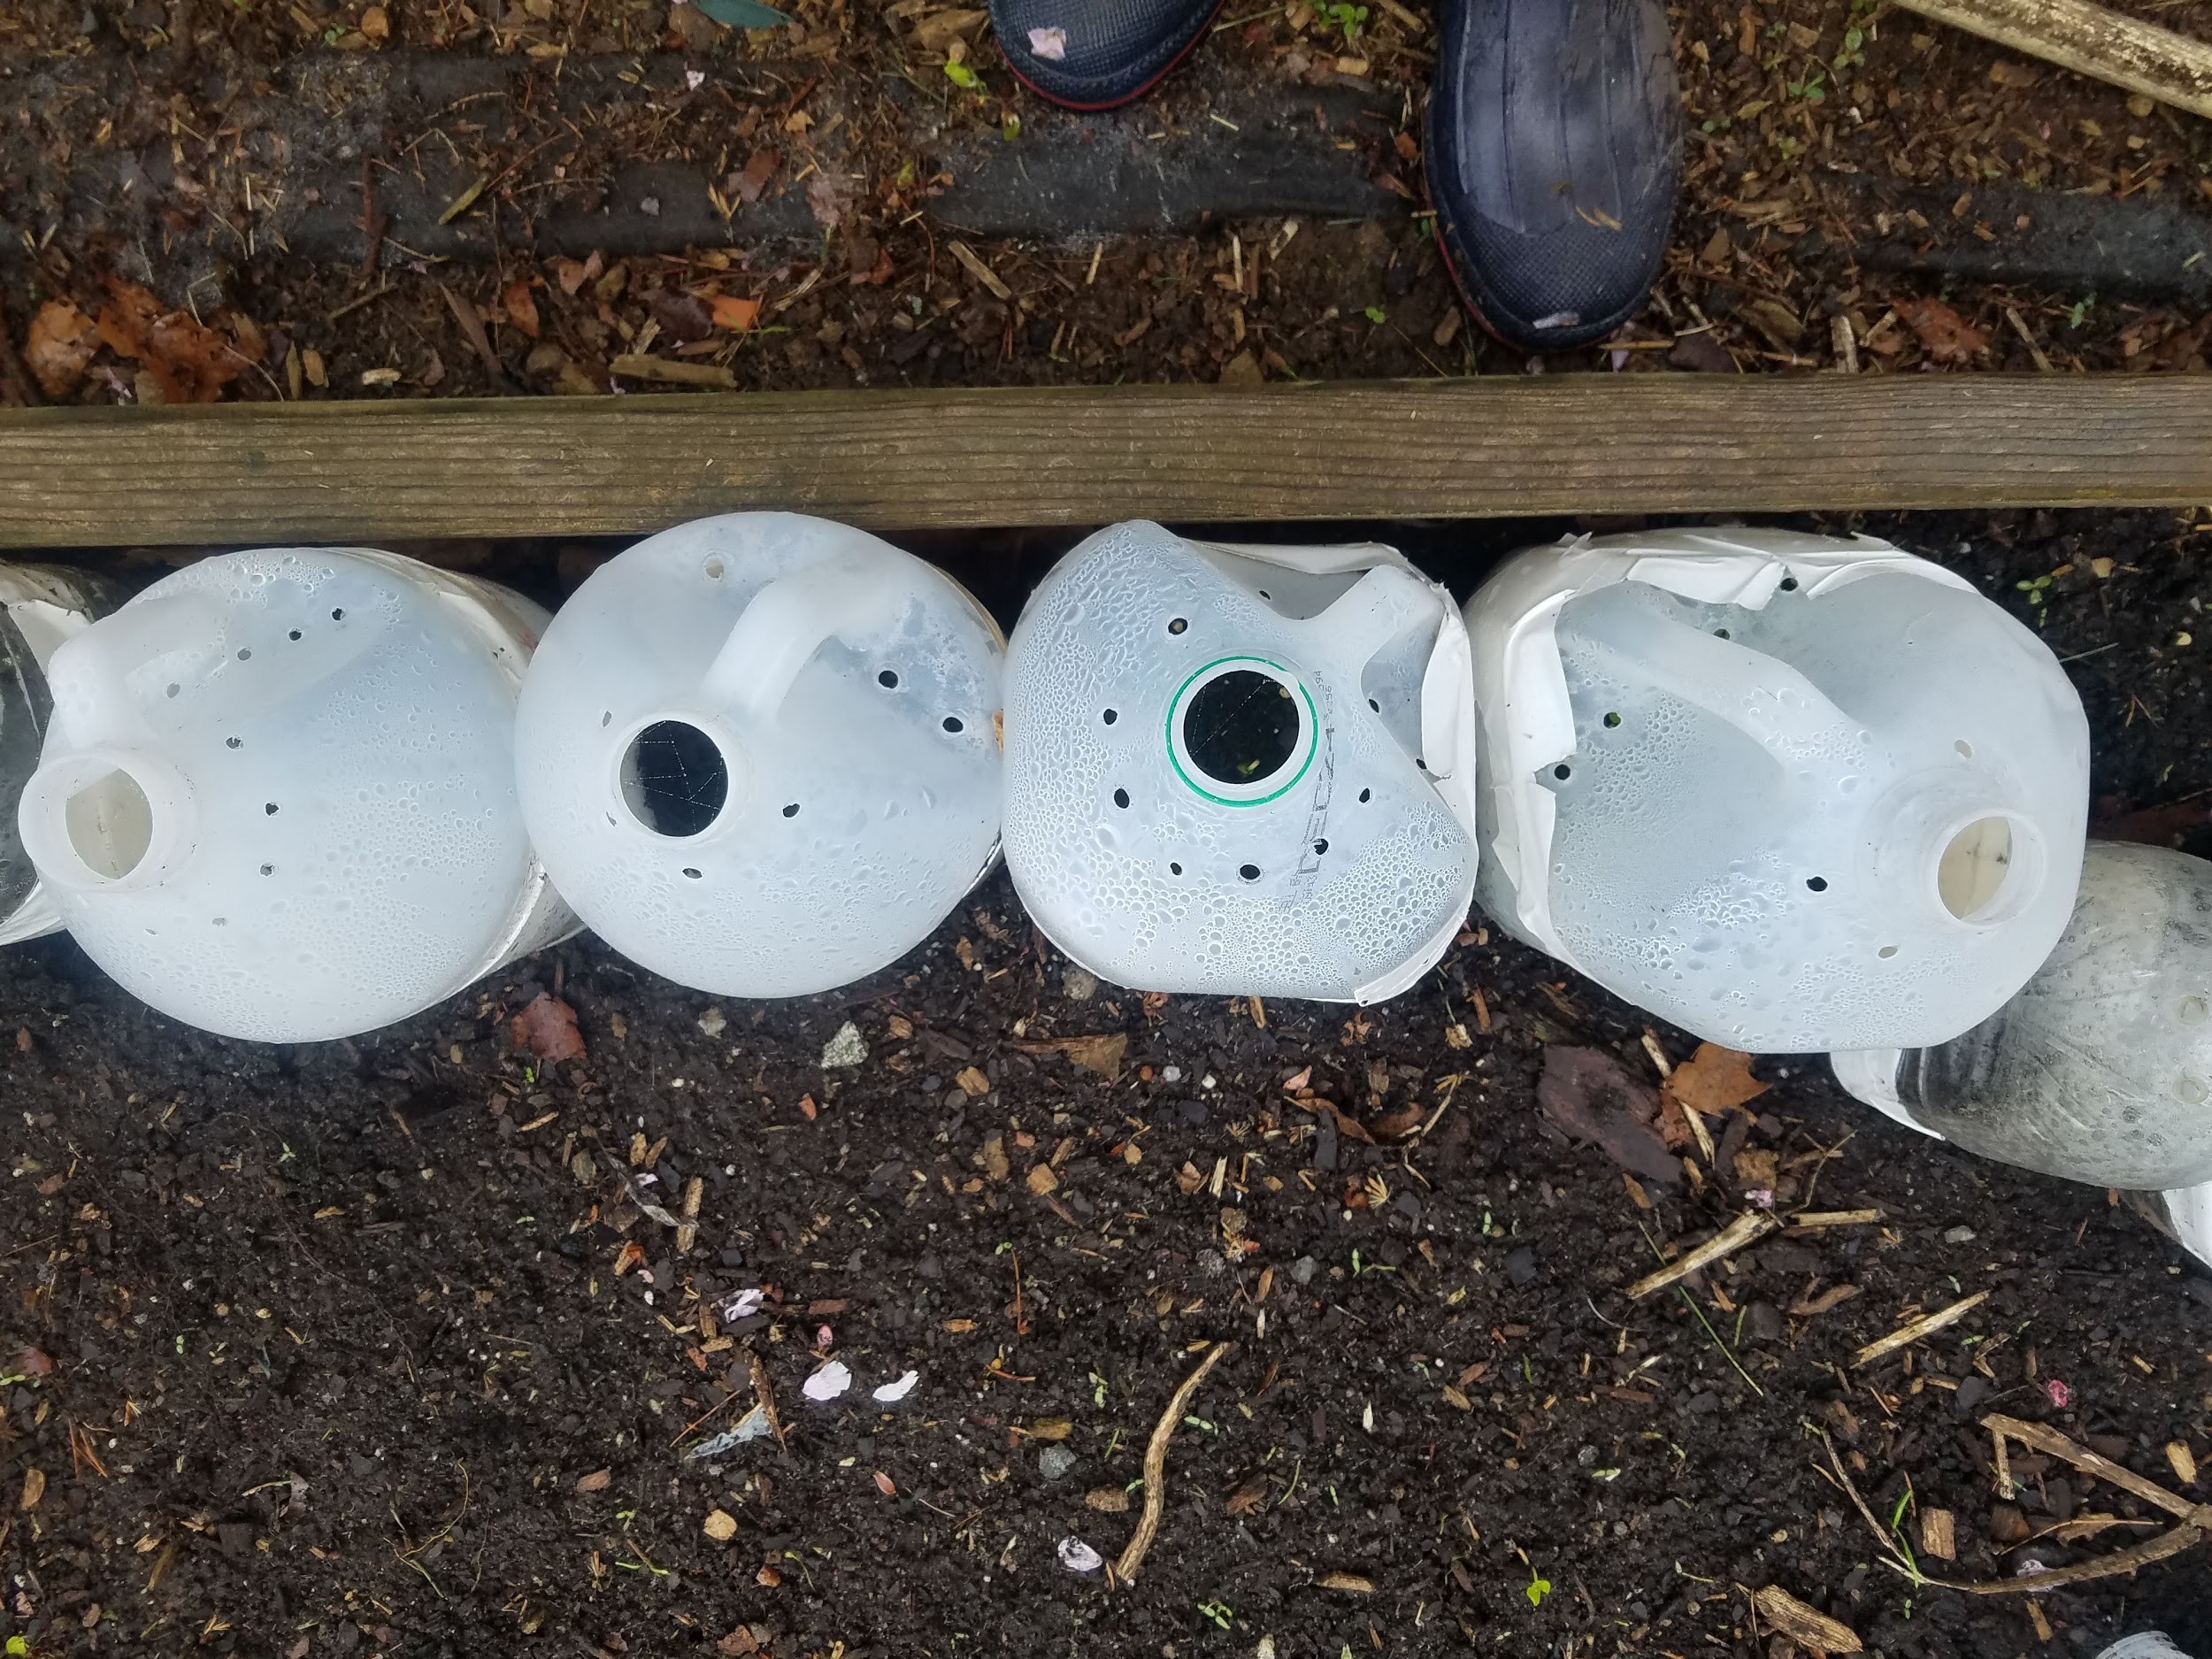
- Periodically check the containers for moisture. A properly vented container will have condensation on the walls of the container on a sunny day with temperatures above 32F. If there is no condensation, check to make sure the container is not dry (place on a tray of water overnight) or there may be too many vent holes (tape up a few and observe the containers on the next sunny day).
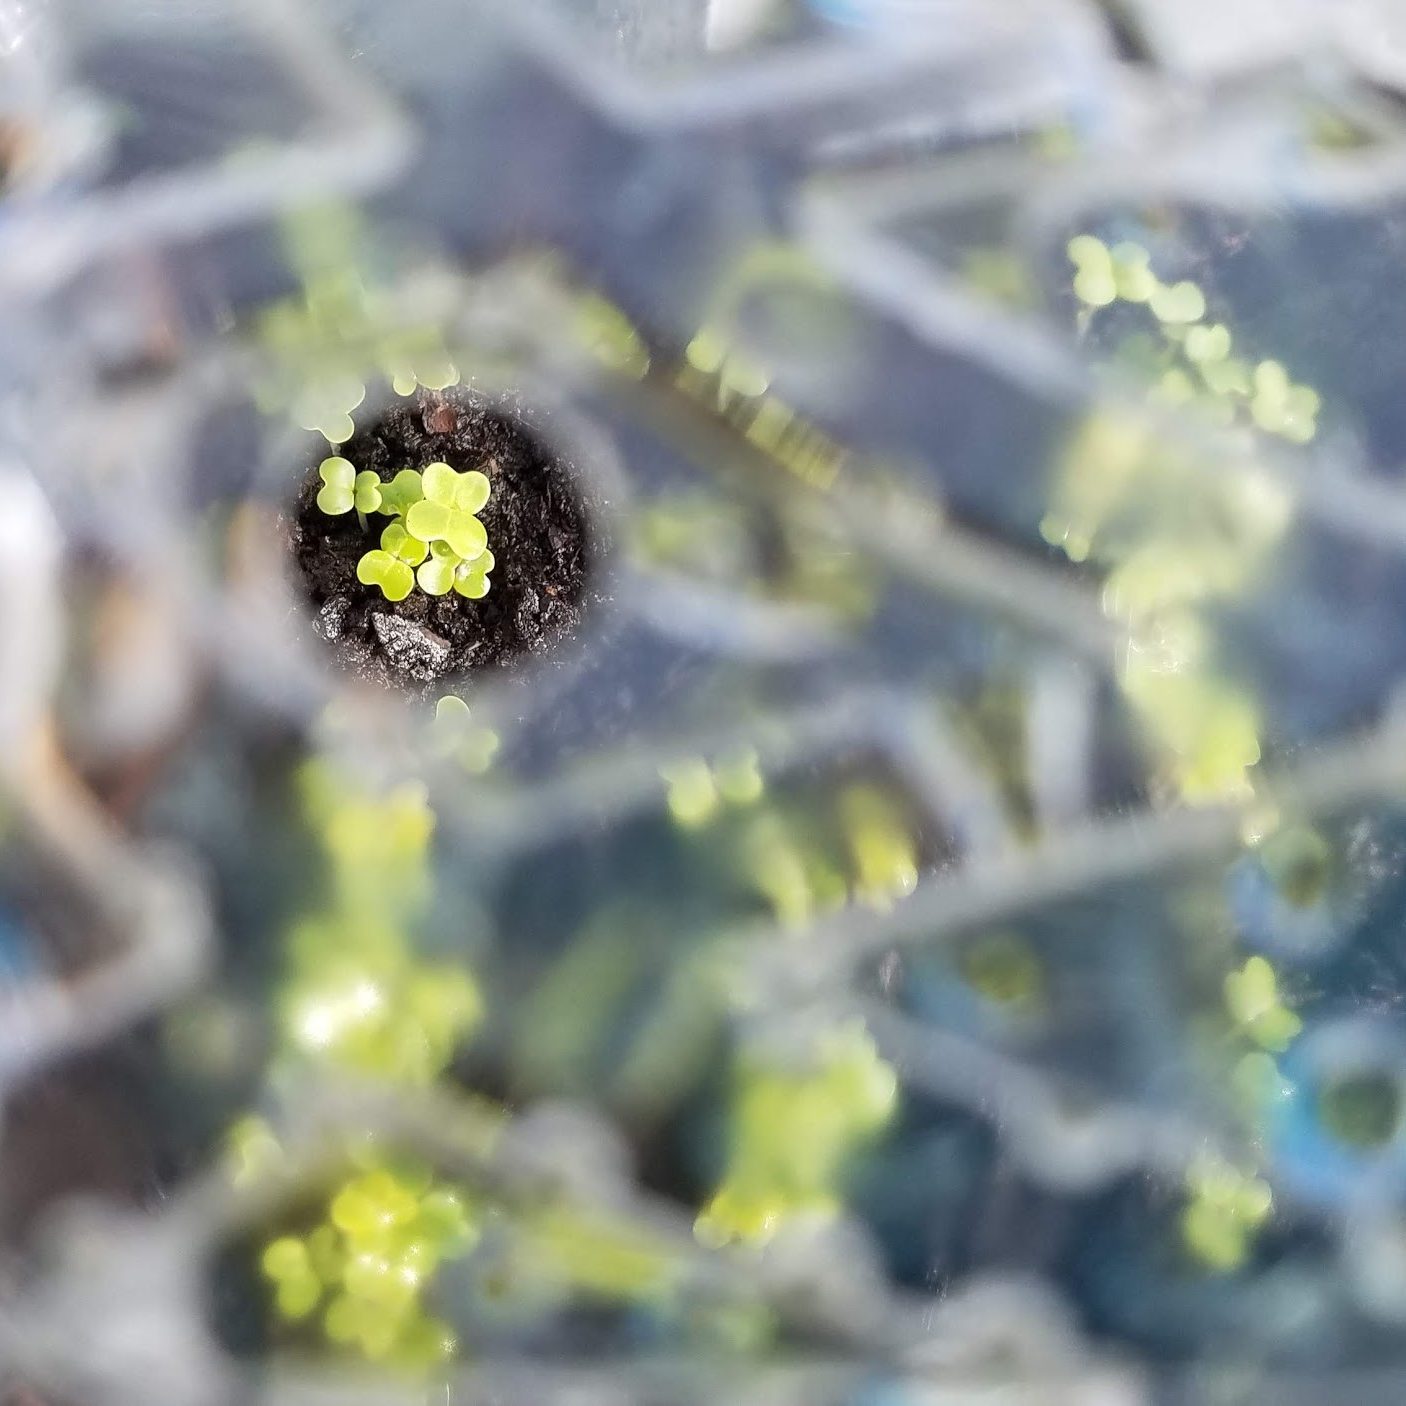
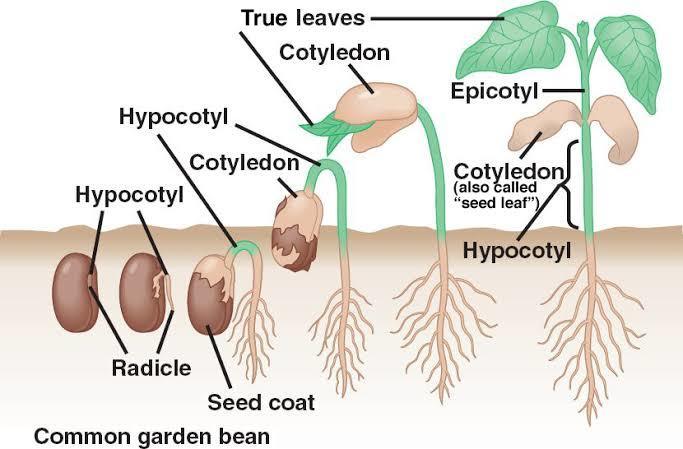
- As the weather warms, the seeds will know the time is right and start to germinate. The first leaves of any plant to grow are usually heart shaped cotyledons, and the second set are called the true leaves. It is SO exciting to see the first set of leaves sprout!
- When the seedlings are tall and close to the top of the container, or the temperatures warm up consistently during the day, the tape can be cut and the containers can be opened slightly to vent. At some point the seedlings will become too tall to close the containers at night. This is fine, as the seedlings have grown up outside and are hardy!
- Transplant the hardy seedlings when the garden soil is workable. Some seedlings can be planted before the last frost.
- The containers may be saved for next season, or rinsed and recycled.
Indoor Seedling Comparison Study:
Plant the same seed in the same type of container and keep it inside. Note the difference in the germination time and rate.The indoor seedlings will need to be watered and monitored more closely. When the danger of last frost has passed, the indoor seedlings can be gradually put outdoors during the day to harden them off (toughen them up) for planting.
Follow the directions above up until number 6. The container can be kept together with a piece of tape, but taping the whole container is not necessary. The container would be placed on a tray, put in a sunny location and the tray would be filled with water. When the seeds have germinated and sprouted a bit, the container should be vented. To vent, remove the tape and prop open the top so that air may circulate around the seedlings. Being indoors, humidity is needed to germinate the seeds, but after germination the seeds need sunlight and water. Keep the tray under the container watered. As the seedlings grow the top of the container may have to be cut off to give the seedling proper room to grow. As the danger of the last frost passes (typically after Mother’s Day in NJ) the seedlings can be placed outside for a few hours during the middle of the day to harden off (toughen up) the seedlings. After a few days of hardening off, plant the seeds in your garden.
Wrap Up:
- How long did it take for the seedlings to sprout?
- How did you feel while you were waiting for the seeds to sprout?
- How did you feel when the seedlings finally had their first leaves?
- If you planted indoors and outdoors, what differences did you notice? Did the plants grow to be similar size? Did the plants have the same number of flowers or fruits?
References:
WinterSown Educational Organization: wintersown.org
Penn State Agricultural Extension: extension.psu.edu/successful-winter-seed-sowing
How did you like this activity? Please share any questions, comments, or photos that you and your child have on the Raritan Headwaters Learning Community Facebook Page!
More Raritan Headwaters Learning Resources