Make a personalized (and useful!) tool for your next hiking adventure.
Adding a hiking stick to your outdoor gear would greatly enhance your hiking experience. Having a hiking stick can help you to balance when crossing a stream or when traversing difficult, rocky terrain. You can use it to push brambles out of the way to avoid becoming entangled in them. A hiking stick can also be used to examine something hands-free that you may find on the trail such as a dead animal or animal droppings (known as scat). Created by Tracy Gordon, RHA Educator
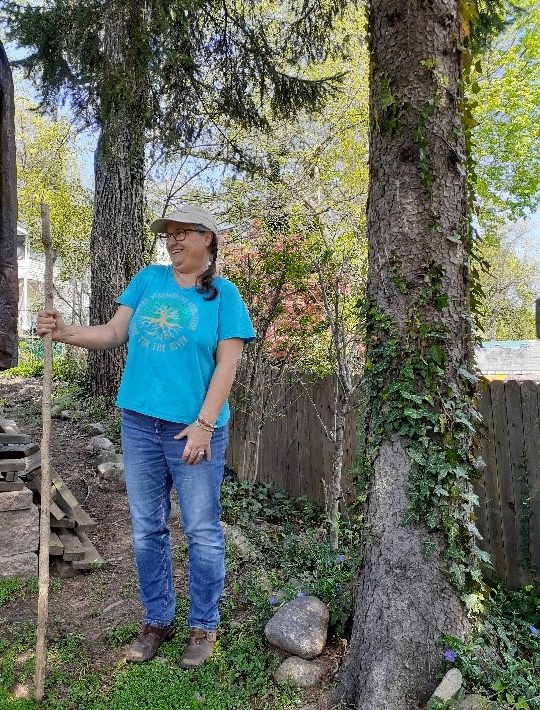
Ms. Tracy with her “perfect” walking stick!
Level: Any age
Duration: 1 to 2 hours
Setting: Outdoor and/or Indoors
Materials:
- Help of an adult
- Stick
- Saw (to be used by adult)
- Swiss Army Knife (to be used by adult)
- Paint, Varnish (optional)
- Yarn, rope, leather cord, parachute cord
- Beads, shells, feathers
The Activity:
- Find the “perfect” stick. Search around your yard, when walking about the neighborhood or hiking in the woods. You want to select a stick that is fairly straight with a 1” to 2” diameter. Make sure the stick is not rotten or showing signs of rotting; insect damage for example. Best to choose a stick that has recently become detached from the tree. Please do not intentionally trim a tree branch to obtain your hiking stick.
If you find a stick that is too long, you can ask an adult to cut it for you.
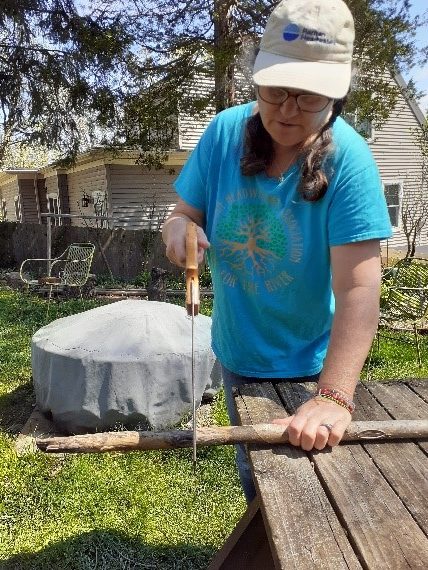
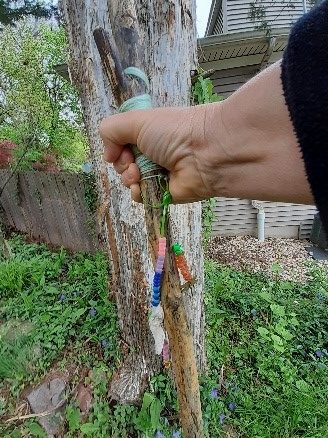
- Trim your stick to length. If you hold your stick in a comfortable position for hiking use, there should be approximately 2” to 4” of stick above your hand. Best to have an adult cut your stick to length.
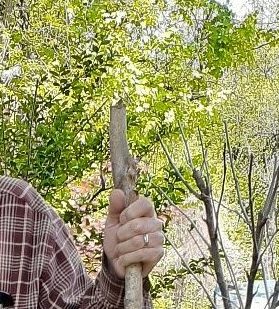
This stick is perfect, with 2 to 4 inches above the hand.
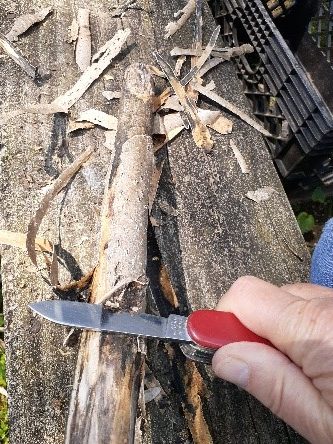
- Whittle off the bark (optional). This step is not essential, but you would have a smoother stick if you did remove the bark. This option would be more appropriate for an older child to do since it involves the use of a knife. Always whittle away from your body, with your legs clear from the knife motion.
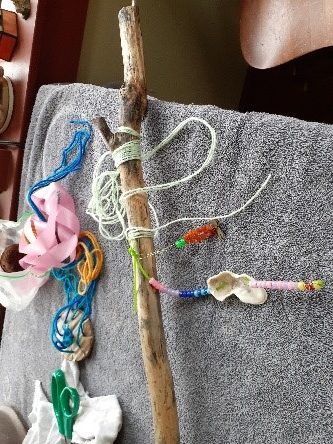
- Decorate to personalize your hiking stick. There are so many ways that you can customize your hiking stick. Whittling, painting, wrapping with yarn or string, adding beads or feathers.
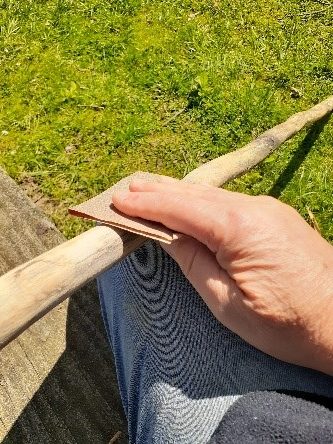
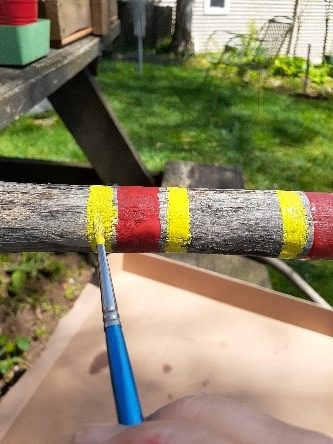
- Painting: If you opt to paint your stick you may want to sand it smooth first with 80 to 100 grit sandpaper. Jazz up your hiking stick with bright colors and interesting designs. I want to be able to easily spot my hiking stick if I drop it onto the ground, so I choose bright red and yellow.

- When you are satisfied with your painted designs you can put on a coating of varnish in order to protect the paint from chipping of easily. Wipe the varnish on with a clean cloth, or piece of old t-shirt.
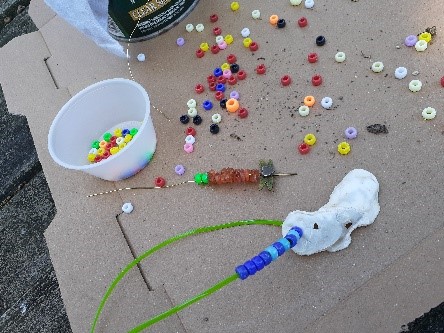
- Wrapping and Beads: Look to see if you have any yarn, beads, feathers, leather, etc. in your craft box to further decorate your hiking stick. I included yarn, lanyard string, beads, a dragonfly earing that broke, and an oyster shell on my stick. The possibilities are endless. Have fun creating your own personal hiking stick.
- After using your hiking stick what would you have done differently to make it?
- Is it too long or too short? Sturdy enough?
- Consider making hiking sticks as gifts for family and friends who love to hike.
Sources:
https://www.wikihow.com/Make-a-Walking-Stick
Wrap Up:
How did you like this activity? Please share any questions, comments, or photos that you and your child have on the Raritan Headwaters Learning Community Facebook Page!
More Raritan Headwaters Learning Resources